Ultimaker Heated Bed Now Available

Ha. Within a couple of days of me changing over to the BuildTak print surface Ultimaker have announced a Heated Bed kit for my printer. Oh well. There may be some second hand printer parts going up for sale soon.

I've always wanted a heated bed for my printer. Una, my Ultimaker 1, does a lovely job on very small objects, but on larger ones there is always some warping as the printed object cools and contracts, lifting the corners and turning any rectangular object into a cushion. 

A heated bed solves that. It also gives you a smooth glass surface to print on so that you get lovely shiny prints. The upgrade replaces the entire print assembly, which is also cheering for me as I made a bit of a botched job of making the original, giving Una a rather lopsided appearance. The new bed should put that right and so I've ordered one.

BuildTak Printer Surface

While I was at the 3D printer show a while back I picked up a sheet of BuildTak to put on Una, my Ultimaker printer. Up until now I've used 3M blue masking tape underneath all my prints, and it works quite well, but I've never been able to get a smooth finish because of the gaps between rows of the tape. 

The surface that you print on is actually quite crucial, in that the heated plastic must stick to it well enough to allow the item to be printed but not so well that you can't get the darned thing off the bed afterwards.

BuildTak manages to do this very well. If you're like me, and you've not got a printed bed for your printer, then you might like to have a play. I'm much happier with the quality of the surfaces that I've printed on the BuiltTak bed. They have a slightly rough texture but it is much better than the one provided by tape. The company says that the surface should last for a while, I've done quite a few prints now and it seems to be holding up well. 

Pro top: if you are printing lots of the same thing, move each one slightly on the print bed so that it spreads the wear on the surface. Also, if you want maximum quality, move the print closer to the back of the printer. This is because when the printer is moving at speed the print bed (which is only supported at one end) will tend to waggle and leave ripples in the printed surfaces. 

Printing the Humber Estuary

Some time back we got an email from Chris in the Geography Department. He had some data that he wanted to visualise in 3D. Warren and I thought it might be fun to have a go and so Chris sent through a file and I wrote a little Python program that converts it from the DEM format that Geographers like to the STL format that Cura and Una like. Above you can see the results being displayed in FreeCad.

This is the surface being printed. You can see that the bits close to sea level have been filled in and the higher regions are being "shaded" with mostly empty space. The printer will put those bits on later. The groove is the path that the river has cut into the seabed.

This is the finished result. If you look carefully you can spot the Spurn Point at the end of the land. The height has been massively scaled up, along the top you can see some hills, this is about where the Humber Bridge goes. 

Chris wants to use the models to help people visualise what happens when an area is flooded. The next thing to do is try to produce some models with different colours for the areas above and below sea level. 

3D Printed Winterfell

I'm not a fan of Game of Thrones. But I do quite like 3D printing. Our 3D printerns found a really superb 3D model of Winterfell, which is apparently a location in the program. They used the departmental Ultimaker 2 to produce a lovely version of it, so I had a go at getting Una, my home made Ultimaker 1 to print the model. And I'm very pleased with the results, which you can see above.

The great thing about this is that it really doesn't look very 3D printed. It just looks like a little model.  Looking at the picture I need to do a bit of tidying up, but the fundamentals are very solid. 

In terms of comparing an Ultimaker 1 with an Ultimaker 2 the most noticeable difference is that the Ultimaker 2 seems to be better at retraction. This is when the printing filament is pulled back into the print head prior to a move. The printers do it so that they don't leave strings of excess printing material between features on model. Una is a tiny bit more messy than the Ultimaker 2. This is probably due to the slightly larger size of the heated head. 

But overall I'm well pleased with this. 

Microsoft 3D Model Repair Service

One of our "3D Printerns" (students who are spending 8 weeks in the department over summer working on 3D printing) was using this today. It reminded me that I really ought to tell the world about it.  (like my blog is some kind of public service or whatnot.....)

Anyhoo, one of the problems with making 3D models is that sometimes you get bits of data in there that just don't make sense from a 3D point of view. Elements can intersect in odd ways or you might get tiny holes in meshes. These imperfections can cause all kinds of problems when you try to move from a model to a physical artifact.

Normally you need a person to go through and tidy the model it up, but Microsoft have a free, cloud based, service that will just accept your models and tidy them up for you. It's all free, and very useful. You can find it here.

3D Printerns

Mr Burns seems to like 3D printing....

Mr Burns seems to like 3D printing....

The department is running a new initiative this year. We have a bunch of undergraduate students working as interns for a couple of months over summer. They are being paid to work on interesting projects "just to see where they go". The idea is that this will lead to research efforts and other interesting stuff.  The prospective interns were interviewed a few weeks back and they'll be starting in July. It's going to be fun. 

One area of interest is 3D printing, which is rather nice. It means that the departmental 3D printer (which doesn't have a name - yet unlike Una) will be getting even more use over summer. At the moment he/she/it (really must find a name) is busy printing out parts for our robot army (not sure if I should be talking about that). Perhaps we need another printer. Of course, we'll need another name then....

I really hope that the Summer Interns scheme becomes an annual thing. It provides a great way for students to explore just working with things to see what happens. 

Improving 3D Printer Quality by Adjusting the Temperature

For a while now I've been trying to improve the quality of prints from Una the Ultimaker. I've replaced quite a few bits and bobs here and there and she is now pretty reliable. But I've been having problems with "lumpy layers". Objects with flat sides end up having lots of ridges in them, as if the printer was laying down layers of different thicknesses.

You can see the effect above. The layers at the bottom of the print are nice and smooth, and then they suddenly become thicker and more uneven. This is not a huge problem but, me being me, I've been trying to figure out what causes it, particularly as earlier prints didn't seem to have the same problem. 

Turns out that it is all down to temperature. I used a plugin which is part of the Cura slicer which converts designs into printer instructions. The plugin lets you tweak printer settings at different heights during printing. The layers at the bottom of the print were printed at 210 degrees centigrade, then it switched to 215 and so on upwards in steps of 5 degrees. The effect of the changes is much more significant than I thought it would be. I've noticed that different makes and colours of printing material have quite different temperature profiles. I think I'll have to do a test print like this for each one and then set decide on an optimal temperature.

Oh, and I also managed to include a human hair in the picture so that you can get some idea of scale. It really is astonishing how precisely this technology can be made to work. 

Update: One thought occurred to me after writing this post. The temperatures I'm quoting are as reported by Una, and are probably unique to her (it) as different machines will have different arrangements of print head and temperature sensor. If the temperatures that I mention don't work for you the try different ones, the important point here is that it is worth calibrating your machine for each different material. 

Home to a Bluetooth Printer

We spent the night in Whitby at the Dolphin Hotel. We had a lovely large room which overlooks the bridge right in the centre of the town. I took the photo from the room first thing in the morning, just before we headed down for a really nice (and huge) breakfast. If you are looking for somewhere to stay, I strongly recommend the place.

Then we headed home and I found some time to finish off the hardware for the Bluetooth printer I've been working on.  Note how it is a Bluetooth device, and I've put it in a bright yellow enclosure. And why not....

When I designed the box it seemed like a good idea to put the switch in the bottom. Of course it is actually a bit silly, as whenever you put the box down you turn it on or off. Fortunately I have some bit stick-on feet that help with this, but I'm going to have to refine the design anyway as I don't seem to have left much room to allow the actual construction of the device.....

This is the guts of the printer, just a bunch of batteries and a trusty Bluetooth adapter. I'll post full details of construction and the software later this week. 

Making 3D Pictures with Cura

Just found out that the lovely Cura software that I use to slice 3D models for the my lovely Ultimaker printer will also import images and then create 3D landscapes from them. It will assign the height of points on the surface to the brightness (or darkness) of the image. You can use it to make rather nice renderings of text. I've actually printed out the above and will be giving to one lucky person who registers for our Careers and Internships event next week.  I'm also going to print out some 3D Business Cards. 

The event is on April 2nd and there will be free food, drink, business cards and mugs and other merchandise. Just for turning up and maybe getting an internship or a career. 

You can register here.

Computer Science at the Science Fair

The university has organised a rather spiffy Science Fair. I suggested to Robert that it might be fun to set up our shiny new Ultimaker 3D printer on the Computer Science stand. So we did.

We were a bit worried about just picking up the machine, carrying it across campus, dropping it onto a table and then firing it up. But it didn't seem to mind a bit, and has been happily printing out vases and gears all day today.

We also had the Occulus Rift and some 3D displays along with some digital art that also proved very popular.

I went over to see Robert at lunch time and the place was awash with students and folks from all over the place taking a look at the science that we do here.  

An Ultimaker 2 in the Department

I've had my Ultimaker printer for nearly two years now. It was around now in 2012 that I ordered it, and the kit took around 6 weeks to arrive as they were very popular.

I've had a lot of fun with Una the Ultimaker. I've replaced her drive mechanism, print head, pulleys and print bed supports and added end caps and a bunch of other things. And I've printed one or two items as well. I like Una very much and most of the time she rewards me with good looking output.

Mr. Burns seems to approve

Mr. Burns seems to approve

This week our departmental 3D printer arrived. They asked me what to get and of course I said we should get an Ultimaker. But I suggested we get an Ultimaker 2 as this is pre-built and looks to have moved the field on a bit. It took around 6 weeks to arrive as they are very popular, so some things haven't changed I suppose.

I set the new printer up in my office and had it working within half an hour or so of opening the box. It is fundamentally the same as Una, but is much more of an appliance.  It has lost a lot of the "home spun charm" of the original, but replaced this with a slickness that would make it much more viable as a printer that you get because you want to print stuff, rather than tinker with the printer itself.

Some design changes took me by surprise. You now set things like print temperature on the printer rather than in the slicing program. This actually makes a lot of sense, in that you will need to customise your printing for different kinds of fibre and you don't want to re-slice the model every time. The integration with Cura, the program that converts your designs ready for printing, is impressive and once I'd fed the fibre into the machine (the only tricky part of the setup) I was turning out prints that were at least as good as ones from Una. The only real problem for me was that the heated bed was set to a temperature which was much higher than it should be for the PLA plastic I was printing. I turned the temperature down to 60 degrees and things got a lot better. 

I do miss the sense of control that I have with Una. The print display on the Ultimaker 2 just tells you how much time is left on the print, rather than the other useful metrics that I get. However I'd be much happier leaving the new one to print on its own, something that I'm not keen to do with my printer. 

One major improvement with the Ultimaker 2 is the fan arrangement around the print head, which blows cooling air from both sides onto the object being printed, so that there is a better chance of the next print layer being put down onto solid plastic.

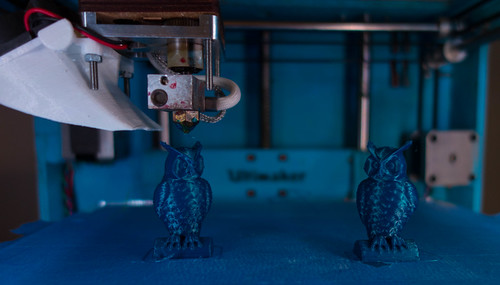
I really liked this, so I had a look around to see if I could find something similar for Una. I found this design and so tonight I spent a happy couple of hours installing some new fan ducts along with a pair of very posh fans that are completely silent in operation. I reckon this has made quite a difference to the printed output, the definition on both sides of my owl test piece is now much better than before. Previously the right hand side of the owl face was a bit of a mess because it faces away from the fan. Now things are a lot more symmetrical. 

The next step is to change the fan arrangement on Una to make her a bit quieter. The Ultimaker 2 is very quiet in operation and I want to get rid of the rattling fan that was supplied as part of my kit, and seems to be rattling even more now.

If you want to get a printer that represents state of the art in FDM (Fused Deposition Modelling) printing then I reckon you'll do well with the Ultimaker 2. It produced some of the best prints I've ever seen right out of the box and is a very well presented package. 

Printing Vases with Ultimaker

Some time back I found the "Spiralize" options in the Expert settings for Cura, the slicing program that I use when I'm printing with Una the Ultimaker. This lets you take a solid object and generates a print that just wraps a single layer print round the outside of the object.

It is called "Spiralize" because the print ends up being one long spiral, with the head laying down successive layers as it goes round and round in circles. The print that you get is very thin, rather like a lampshade, but if you use translucent materials (like the  nice transparent fibre from Faberdashery) the results are rather good. 

Printing in the air

This is the kind of thing we want to see.....

This is the kind of thing we want to see.....

I found out something kind of interesting today. Turns out that if you print things which are 1 mm above the print surface they don't actually print very well. I'd designed a little plastic lid with mounting pillars and placed them on the base, but i'd left a gap of 1 mm underneath the pillars, so the poor printer tried to print them in the air, with  "hilarious" consequences. 

Thinking about this, it would be great if the design programs displayed shadows because if I'd seen the gap underneath the pillars I could have fixed it straight away.

Ultimaker and Doodle3D Offer

This is officially a good deal. 

This is officially a good deal. 

I've had my Ultimaker printer for a while now. I made it from the kit (a great way to spend a couple of days) and it works a treat. At the moment mine is printing out a rather nice vase based on a Koch snowflake design. 

Ultimaker have released a version 2 of their printer, but I reckon there is plenty of life in the old one yet. Particularly if you pair it with a Doodle3D device that lets you create and print objects really easily over a wireless network.

And now they have a rather nice deal where you can get the printer kit, plus an UltiController and a Doodle3D device for less than 1,000 euros. If you want to get into 3D printing, and want one of the best devices on the market, you could do a lot, lot worse. 

Black Marble 3D Printing Magic

DSC04303-Edit.jpg DSC04311-Edit.jpg

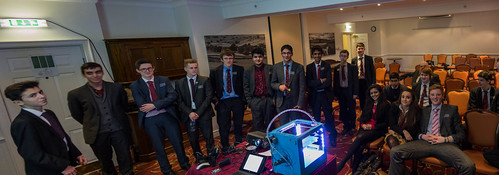
These are most of the two groups,carefully stitched into almost successful panoramas, and with Una the Ultimaker in the foreground, as it should be.

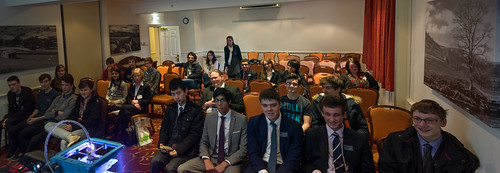
I love doing talks like this. The folks above are all Sixth Formers from schools around Black Marble, who have invited them in for some computer based inspiration. They had talks about cloud computing, encryption, built some systems using Gadgeteer and then had a session from David and myself where we talked about university life and showed off some 3D printing.

I’d taken along Una the Ultimaker and, despite me nearly breaking her during the first session, she behaved in an exemplary fashion, printing out the weather forecast in 3D and then, during lunch, a couple of tiny owls.

I reckon that 3D printing is going to change the future and have a huge impact on the way we do things. I made the point that when I was the same age as the audience a printer was someone you gave things to have them printed for you. Nowadays everyone has ready access to high quality colour printing on cheap inkjet devices.

We are moving towards a world where cheap 3D printing is going to mean that physical objects can be customised and built on demand. There will be no reason why the things around you shouldn’t be just the way you like them, and completely unique to you. I told the audience that learning a bit of 3D design skills would be a good idea, along with some programming smarts so that you can write code that will build designs for you, and let you create objects from any kind of data that you like, including of course the weather forecast.

Thanks to all the folks at Black Marble for setting up the event and to David for doing the serious stuff.

I’ve put the slide deck here.

How Woody Allen can improve your 3D printing

WP_20131129_08_00_21_Pro__highres.jpg

It’s actually quite easy. I’ve noticed that there are some irregularities in the output from the 3D printer. The output is actually pretty good now, but I’m getting some horizontal banding along the sides of objects.

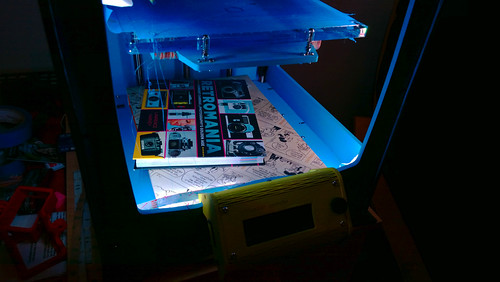
Someone on the interwebs suggested that the banding is due to vibration of the base panel of the printer. This supports the print platform and if it is wobbling up and down this could cause some of the problems. So I put my copy of the Woody Allen book “Dread and Superficiality” on the base, along with a retro camera book I got last Christmas, and the vibrating seems to have been damped down a bit. I think I’ll make a proper damper out of some old floor tiles, and take a look at the fan that is causing most of the vibration.

I did some printing and things seem to have improved a bit, which is nice. I’ll know more when I’ve printed some straight sided objects. At the moment I’m mostly printing Tiny Owls for some reason….

Microsoft 3D Design Tool Released

Screenshot (1)

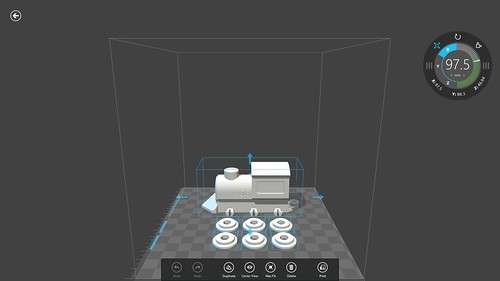
Earlier this year Microsoft announced that they would be supporting 3D printers as native devices in the Windows 8.1 operating system. The aim of this is to make 3D printing as easy as 2D printing is today. They’ve just released a 3D design tool, along with some rather nice 3D designs, which you can download for free from the Windows Store. Just search the store for “3d printing” to find it.

The program works with a newly released printer driver for the Makerbot printers. The program looks very good, but unfortunately at the moment I can’t use it to print with my Ultimaker yet as that printer doesn’t have driver support. I really hope that it arrives at some point, it would be a great step to making a 3D printer a proper “appliance”.

Cool Printing

DSC03663.jpg

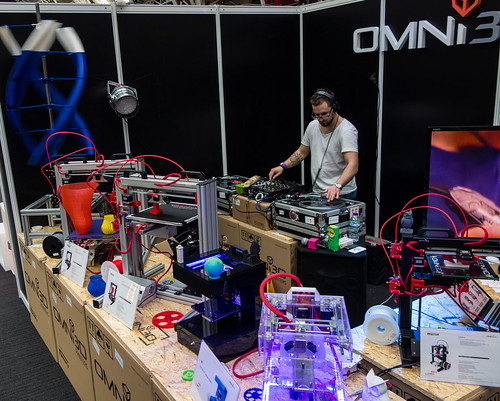
One more picture from yesterday. This stand had some amazing printers and a DJ as well.

Today I had a go at printing with some of the fibres that I got yesterday. It didn’t start well to be honest. I put in some lovely translucent green PLA that I’d been given and the printer produced some rather gooey looking outputs. Turns out the new material had a much lower melting point that the stuff I normally used. So when Una heated it up to 220 degrees I was printing with something very runny indeed. When I brought the temperature down to a slightly cooler 200 degrees things improved massively, and I ended up with some much more pleasing results.

That’s a tip for 3D printing folks. Try different temperatures. I’ve now started printing a bit cooler and my prints have a bit more detail, and the layers seem more even, which is nice.