Connecting Domains to Azure Web Applications is much easier than you think

I love it when a job turns out to be much easier than I was expecting. I’m building a portal site for the Connected Little Boxes project. It is going rather well. I’ll be giving folks access to it soon so that they can create their own devices and control them from anywhere via the web. The site is hosted on an Azure web application that has been great fun to build. But I want the site to have its own domain, rather than https://clbportal.azurewebsites.net/ (although this works fine). This morning I thought I’d sort it out. I was a bit worried about fiddling with domain names and Azure settings and whatnot. But I had the whole thing working before my coffee break. I bought the domain clbportal.com from namecheap . It cost me around 12 pounds. Then I followed this really useful howto which took me through configuring the domain and setting it up on Azure. If you are making anything you want to make public you really should give it a custom domain. It makes it look a lot more professional and it makes it much easier to move from one provider to another.

The only thing that caught me out was the way that https seems to work on my new domain. You can browse to the site using http://clbportal.com but if you do this you end up being served pages which are not secure. If you go to https://clbportal.com you get the secure version. Normally the two work interchangeably, but one of the things that my site does is connect to your device over the serial port on your computer. This only works if you are browsing from localhost or a secure server. There is talk of an Azure setting that you can tweak to make sure your site is always served as the secure version but I can’t find it anywhere. So instead I’ve changed the internal references so that when you navigate around the site you get sent to the secure versions.

Making a node.js Cloud Application in Azure

I solved my Heroku problem from yesterday. I’d added some new .env setting values but not copied them into the Heroku application. So when the app woke up on the server it instantly fell over because lots of things were not set properly. The app was soon working fine, but it did have one problem. Heroku turns an application off if it has not been used for a while. This is usually fine. It will be started next time someone visits the site. However, at the moment my app also monitors MQTT and registers devices when they connect, so I need to have it running all the time. You can stop an inactive app from being switched off, but this involves spending money on a paid service which, being a Yorkshireman, I’m not keen on.

Instead I thought I’d try hosting the application on Azure, where I have some credits (not that I expect it to cost a lot). I followed this tutorial (or at least the second half of it) and in no time at all I had something that didn’t work. Oh well. The error was interesting. Azure didn’t know where to start. I was a bit confused because exactly the same code was running fine on Heroku. It turns out that I needed to add a start element to the settings in package.json:

"scripts": {
    "devStart": "nodemon server.js",
    "start":"node server.js"
  },

I think that Heroku just finds the nearest .js file and runs it to start an application if one is not specified, whereas Azure is a bit more careful. Anyhoo, after this I now have a management interface for all my devices.

This is the control panel for one of my little boxes. I can modify the device settings, see when it was last connected and send it commands to do stuff.

It really is incredibly easy to make your own node applications and deploy them like this. If you don’t care about app timeouts you can build and deploy something entirely for free. The integration of the process in to Visual Studio is very impressive.

I put the app onto a paid subscription (around 10 pounds a month) and then twiddled the application settings to make it always on. Great fun.

Azure Space Mystery is launched

The Azure Space Mystery launched last week. Its an interactive text driven game in which you have to save the International Space Station from crashing down to earth. You get to push buttons, flip switches and turn handles. And that’s just on the first page. You also get to meet up with inspirational people, all rendered in cool pixel graphics.

I’ve managed to crash a few times, but I’ve enjoyed doing it and learned a bit too. If you have kids the right age you could have a lot of fun battling through the asteroids and other hazards together. You can find it here.

Using SSL security with ESP32 and ESP8266

bigerror.png

The story so far…..

Robert has been trying to connect an ESP8266 embedded device to an Azure IoT Hub, something he has done many times with no problems. Except it no longer works. Having spent a day failing, perhaps it is time for Robert to have some success. Now read on…..

Yesterday was not a good day. Today was better. To summarise my problem: I want to use my embedded devices with Azure IoT hub so that I can exchange messages with services in the cloud. Azure IoT hub is a “proper service” in that it supports device registration and uses the Secure Sockets Layer (SSL) for connections. I’ve written my code so that it uses the secure WiFi client in the ESP8266 and it has worked before. But yesterday it broke and I couldn’t figure out why. Today I did. Go me.

It turns out that the solution is simple. Add the statement above to set your secure client to insecure mode. But why does this work and what does it do? Does it mean that my connection is no longer secure? Now read on again…..

There are two reasons for using SSL. The first is to make sure that the data that is being transferred securely. I don’t want someone to be able to peek into the packets and pull out passwords and data. The second reason for using SSL is to make sure that the devices is talking to the right host. Without this authentication it would be possible for someone to make a system that pretends to be Microsoft Azure, accept a device connection and then steal all my stuff.

The first part of the problem is solved by encryption. The systems each end of the connection use keys to encrypt and decrypt the data so that anyone watching it go past would just see gibberish.

The second part of the security, making sure my host is really Azure, is solved by certificates which are issued by certification authorities. Microsoft have a certificate for Azure and my my device can verify this. However, to make this work I have to make a copy of the public part of the certificate and store it in my device, which is not something I’ve bothered with in the past. It turns out that I’m not really concerned about someone spoofing Microsoft Azure just to see my data. There is always a balance to be struck between security and convenience, and this is where I draw the line. It may be the wrong place to draw it, but I’m OK with it so far.

This means that my devices don’t have local certificate copies. Up until recently (and with the ESP32 device) the lack of local validation doesn’t cause a problem. But something in the Arduino libraries has apparently changed (or I’m using a different library now). Anyhoo, to make it work now you have to tell the WiFiClientSecure instance created to manage the connection that you are using insecure mode. This doesn’t mean that your data is now being sent insecurely. What it means is that the device is not verifying the server any more. And then it works.

Azure IoT Hub for Free

orchids.png

Everything I achieved today I achieved before 9:30. It was all downhill after that. But I did achieve quite a bit. I’m making a bunch of connected devices and I want to use MQTT to link them together. I could set up my own MQTT broker on a local Raspberry Pi but that would only work around my house and I want these to work around the world. My weapon of choice for these things is Azure IoT hub which lets you connect remote devices to a central server (the clue is in the name).

It turns out that you can set up a Microsoft Azure account for free and then create an IoT hub which is also free and allows for up to 8,000 messages per day. I’m not sure how many messages I’ll need, but I’m hoping that will be enough for now.

Having created my free IoT hub the next thing I wanted to do was connect my devices to this. I’ve done it before and it worked just fine. I did it today and it didn’t. This was the cue to spend most of the day (or at least the portion up to the point where I gave up) trying t figure out why. Unsuccessfully. Wah.

Playing with Linux for Free using Azure

Last week I built Linux PC and started it going on Azure. I kind of did it by mistake, in that I had half an hour between meetings and I thought I’d just do something to pass the time. There was intent there though, in that we are moving the Connected Humber air quality data visualisation platform (that sounds posh) over to Azure.

Getting started is very easy and free. Just follow the instructions in the site here. These are the things I learned when I had a go:

  • you’ll need two PuTTY programs. PuTTYgen to generate an SSH key and PuTTY to connect to the server (if you’re connecting from Windows like I was). When you download the program files there are lots of slimy links to things that aren’t what you want, be careful about this.

  • make sure that you open up port 22 on the virtual machine, otherwise you won’t be able to connect to it using SSH at all (although there is a Linux prompt available on the Azure Portal too)

  • you can reset passwords on your Linux installation via the Azure Portal. This is great if you, ahem, forget to write them down when building the machine

  • a virtual machine starts off in “developer” mode, which means that it shuts down at 7:00 pm each evening. You can turn this off - look for Auto-Shutdown in the settings

  • if you want a static ip address (which you really will want if you want to point a DNS address to it) then you need to set this explicitly. Click the ip address in the virtual machine properties to drill through to the properties for the address and select static

The “machine” is now running and folks who know Linux much better than me are now busily installing the software on it.

Azure Storage Explorer

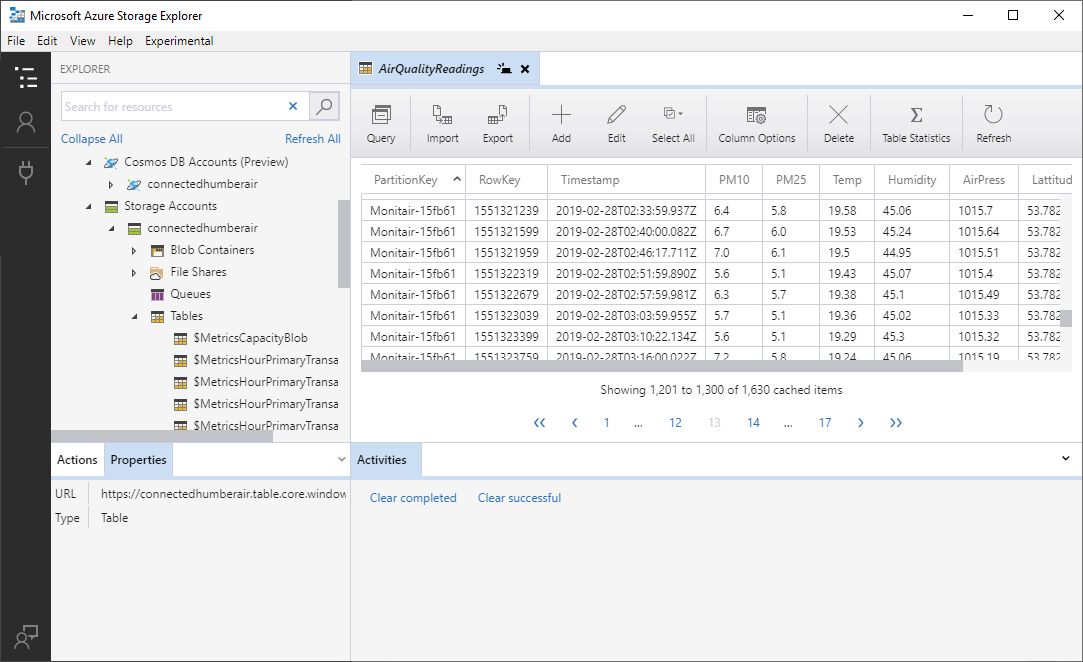
I’ve been playing with Azure Functions and storing values in Azure Tables. It’s very easy to do. If you decide to have a to have a play with these (and you should - you can do it for free) you should download Azure Storage Explorer. It lets you explore your storage (the clue’s in the name) but it also lets you download CSV files, manage binary objects and lots of other nice things. And it works a treat.

Amazing facts to impress your friends....

If you want to really impress someone just tell them this:

“If you want to use MQTT with PubSubClient and talk to an Azure IoT Hub over secure sockets you should use Version 2.4.2 of the LOLIN Wemos framework or your program will crash when it runs out of memory during socket open.”

Then again, it might just be me that would be impressed by this.

Azure Functions with Azure IoT Hub

I really like Azure Functions. I love the idea that you can write pure code that sits in the cloud and just runs. Sometimes all you want is a thing that takes in some data, does something with it, and spits it out somewhere else. You don’t want to build and manage a server, set programs to run on startup, bind them to events and so on and so on. You just want a piece of code with a name and an address.

I’ve been using Azure Functions to capture MQTT messages and store their payload data. This turns out to be extremely easy to do, until you deploy your function in the cloud. Then it stops working. And you scratch your head and wonder what stupid thing you’ve done. You scratch your head, turn on lots of tracing and eventually find that the function is failing on load.

It turns out that one of the configuration items, the connection string to the IoT Hub that the program is using, is not passed over to the settings in the cloud app. You have to manually create the setting for the application and then set it to the required value. Then it all works. Wonderful.

Using Serial1 with the Azure IoT Devkit

A while back I posted about changes you could make to the Azure IoT DevKit library so that your programs can use the second serial port of the device to talk to things like GPS receivers and Air Quality sensors (a particular interest of mine).

At the time I suggested that this could be fixed by adding the creation of a second serial port to the SDK. I’ve just heard back from the team and this is not going to be done. Instead we can create a Serial instance when we need one, which saves resources.

If you want to use Serial1 with your Azure IoT device you can add the following statement to your program.

UARTClass Serial1(UART_1);

You can then use Serial1 in exactly the same way as you use Serial. I’ve put a sample program on GitHub that shows how this works.

Using the Second Serial Port on the Azure IoT Devkit

For some time I’ve been trying to create an Air Quality Sensor using the Azure IoT Developer Kit. It’s a nice little device that has a bunch of environmental sensors, a nice OLED screen and a couple of buttons. It is also properly secure, in that it contains secure storage and you can validate access using X500 certificates.

I like it a lot, but I’ve not been able to use it for air quality work as I couldn’t get the second serial port to work on it. This is important because the air quality sensors that we are using deliver their readings over a serial connection. I’ve tried doing what the documentation says to do but it just didn’t work.

I posted a question about this on the GitHub repository for the kit and got a response indicating that what I was doing should just work.

But it didn’t.

So I had a proper look in the code in the device SDK. After a bit of digging I discovered that two of the source files are missing statements that make the second serial port available to Arduino programs. The file Variant.cpp needs the statement:

UARTClass Serial1(UART_1);

..and the file Variant.h needs the statement:

extern UARTClass Serial1;

Then it does work. I’ve tested it and everything. The picture above shows my cunning test rig, using a USB to serial adaptor that I wired to the devkit. If you’re connecting the device using a MicroBit connector you will find that pin 1 is TXD and pin 2 is RXD.

I’ve put the changes into a fork of the devkit sdk that you can find here. I’ve also told the developer team about my fix, so that it should appear in the “proper” version soon. I’m very pleased to be able to contribute a tiny bit to the development of the device. I feel like a grown up programmer…..

The only problem I have left to solve is that my Air Quality sensor needs a 5 volt power supply. While the USB connector on the Developer Kit board receives this from the host device the power connection is not surfaced anywhere on the board. I can see why this is: you wouldn’t want people inadvertently sending 5 volt signals into the input pins, but it means that my wiring is going to have to be a bit more complicated than it might be.

Anyhoo, I can now start porting my Air Quality Sensor code into the Devkit, which is nice. I’m also going to make a little box for it too.

Air Quality Designs and Software now on GitHub

If you woke up with an urge to create an Air Quality sensor out of either a Heltec or a Wemo device then I’ve got good news for you. You can download all my software and hardware designs from here. You can make sensors that use LoRa in OTAA or APB (these will make sense if you know LoRa or go to my talk later this month). You can also use MQTT to talk to Azure IOT Hub or another MQTT broker including Mosquitto.

All configuration is performed using JSON messages that can be sent via the serial port or over the air. It is very easy to configure a device, no need to re-burn the software each time you want to deploy another sensor with a different name and network configuration.

I call this a “shirk in progress” release, in that I’ve been too lazy to release any new versions for a while. However, I'm now using this as my main development repository and so you can expect updates, including more detailed documentation, over time.

Using an Azure Function to receive MQTT Messages

The video shows me pressing a button on my Air Quality sensor to trigger the sensor to send a new reading via MQTT. The action then switches to the output of an Azure Function running on my PC which is responding to this. I’m very pleased with this.

MQTT (Message Queuing Telemetry Transport) is a neat way to connect embedded devices together. I’ve used it to talk to the Hull Pixelbot devices over the internet using Azure IOT Hub. Using MQTT in this way has meant that my server applications can send commands to the robots to tell them what to do, and also receive messages back.

Creating a server application is all very well, but it is a bit too much like hard work for me when I’m writing code for the Air Quality sensors. In that situation I don’t really want to have a server application sitting in the cloud twiddling its digital thumbs while it is waiting for incoming messages.

What I really want is a way of connecting a lump of code (ideally a C# method) to the event “Hey out there. I’ve got a new Air Quality Reading”. It turns out that Azure Functions just do this. You deploy the function into the cloud and bind it to the Azure IOT Hub and the endpoint that you want it to listen to. And then, whenever your remote node (which could be anywhere in the world) wants to send a message it posts an MQTT update and your function runs.

This is my function at the moment:

[FunctionName("SensorMQTTReceiver")]
public static void Run([IoTHubTrigger("devices/#",
Connection = "IoTHubConnectionString")]EventData message, ILogger log)
{
    log.LogInformation(
$"C# IoT Hub message: {Encoding.UTF8.GetString(message.Body.Array)}"
}

I stole most of how to do this from a very useful howto here. The next thing to do is add some code to the function that puts the data values from the post into a data store and perhaps add handling of alerts if we see air quality values which are out of range.

The next thing to do is build a similar mechanism to process LoRa updates sent via the things network.

Starting with the Azure IoT DevKit

Today I thought I’d have a proper play with the Azure IoT Devkit. There’s a ton of content out there about getting started. It’s actually quite simple to follow. In it’s simplest form you just follow the instructions here, but since the device has a proper security chip I though I’d veer off and see about using the Azure IOT device provisioning service and an X-500 certificate to create a very secure device. It’s another of the built-in examples that are provisioned when you add the Azure IoT Workbench to Visual Studio Code.

Rather pleasingly, I got it working. I’m now looking at making the device into an air quality sensor, just as soon as I can figure out how to get the serial port on the IoT board working.

There’s also an example where you can speak to the board in english and have it display the translation in a language of your choice. Great fun.

Cloud Connected Camping Lights

I was in the Pound Shop over the weekend looking for camping lights. What with we me going camping in a month or so. I'm going to the Electromagnetic Field event at the end of August, and I've been buying sleeping bags and contemplating life under canvas for a few days. 

I found a likely looking light in a camping shop for a fiver but being from Yorkshire I thought I'd take a look at cheaper solutions. I found the lights above, packed in a nice little box, for a pound a pop. Astonishing value, so I bought four. 

Then I got to thinking about making the light more interesting. I've done this kind of thing before and I had some pixel rings and Wemos devices lying around, so I thought I'd have a go. Worst case I'd break a light that cost me a pound. 

This is the light dismantled. I undid the screws that held the base on popped the top off and then slid the transparent cover down and off the bottom of the light. Then I used a knife blade to pop the plastic reflector off the top to reveal the pcb that holds the 11 white leds. I'm going to replace this with a 16 led neopixel ring which just fits. You can get these rings for around 8 pounds, or much less if you're prepared to wait for them to arrive from China. 

The plan is to fit the led ring a shown above, drill some holes in the plastic support and run the wires behind through them, providing a connection and also holding the ring in position. I can bring in the hot glue later if I want to make things even more secure. 

I held the led ring in position, scratched marks on the reflector and then drilled the holes. I'm not very pleased with the bottom hole, but I don't think anyone will see it. I'm only using three of the connections, but I drilled four holes so I didn't have to remember which was the one I don't need. 

These are the wires that I made up for the connections to the led ring. I used solid core wire. I'm connecting to the ground, 5Volt and Data input lines using black, red and white wires. The colour of the wires doesn't matter much, as electricity doesn't seem to care about wire colour.

If you read the Adafruit help pages for the Neopixel ring they talk sensible things about series resistors and capacitors that you can add to improve the signal to the led ring and reduce the chances of damage. I'm leaving those out because I like to "live on the edge", but you might want to add them if you build a light like mine. 

This is the led ring after I fitted it to the reflector with the wires pushed through the appropriate holes. Looks quite tidy to me. Next up we have to take a look at fitting the processor board to the light. 

This is how the lamps are made. They have a slide switch which controls power to the led ring. It's a bit hard to see, but there's a series resistor on the positive side which is wired from the battery terminal to the switch. I'll use the switch to turn the device on and off. 

I'm going to add an ESP8266 device on the Wemos platform. I love this device and configuration, and it just fits. It will give me WiFi for connectivity and my plan is to port my wedding light software onto the Wemos platform. 

This is the device with the signal and power wires soldered in. For some reason I was nervous about soldering solid core wires onto the Wemos PCB and so I soldered in some jumper cables instead. I've done this before and it's a good trick. Rather than soldering a socket and then plugging into it (and having the worry that the plug might come out) instead I just solder the plug straight in. I'll cut the plugs off the other end and wire things up by twisting wires together, soldering them and covering with heatshrink tubing. Probably not as posh as using proper connectors, but much cheaper and at least as reliable.

I'm using one data pin to control the lights. Just because I'm moody, I decided to solder this wire in directly. I stuck the Wemos device onto the back of the reflector using some sticky velcro tape that I got from Maplin. I'm really going to miss that shop.

This is the completed processor fitted to the reflector. I've done the wiring and so I now just have to power up the device to get it going. This is also a useful stage to reach because now that I've connected the power lines for the leds and the processor together I can plug the Wemos device into the PC using a USB cable and test that the lights work. So I did this. There will now be a short break while I get the software together. 

Writing the software took longer than I expected because I found a bug. However, once I'd fixed that I turned my attention to the base of the light. I soldered some new wires to the switch and onto the battery terminals. Now I just have to connect the red and black cables to the ones on the processor and I'm good to go. 

This is the lights and the power all soldered together. I've made the wires much longer than they need to be, this is so that it will be easy to pop out the reflector and re-program the Wemos when I find another bug.

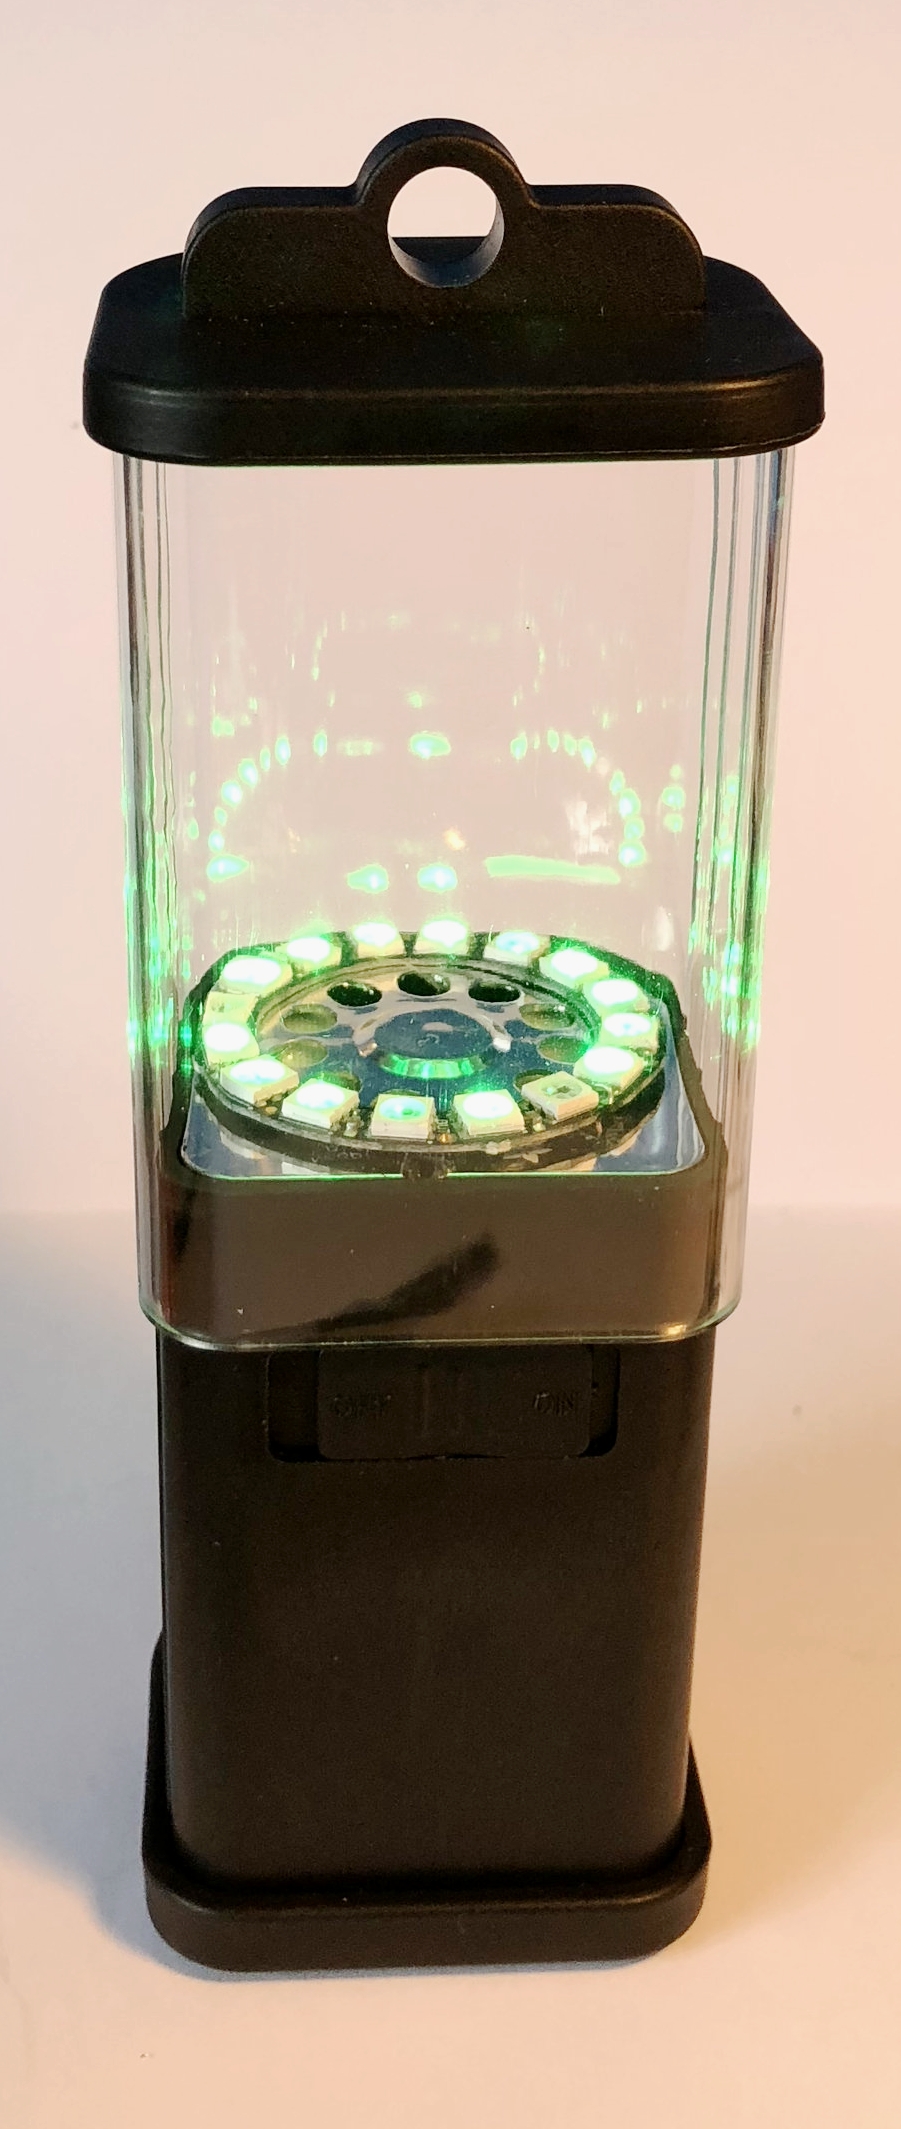
This is the light in action, just after I'd asked it to turn green.

I'm presently using MQTT to connect to the Azure IOT hub and sending text commands to configure the light. The commands are a subset of the HullOS language that I've been using on the Hull Pixelbot. Next I want to make a controller device that pushes commands up into the cloud to tell the light what to do. 

If you're looking for something to play with I can strongly recommend this light. There's a reasonable amount of space to play with - I'm thinking of adding a temperature sensor so that the light can change colour depending on how warm it is. I've discovered that I can perform my light flickering at the same time as wait for MQTT server commands and it all seems to work splendidly. I'll put the code up on GitHub when I've tidied it up a bit. 


With a bit of care you could  take the original 11 pixel ring and cut the tracks on the pcb so that each led could be controlled individually, perhaps by an Arduino Pro-Mini to get a really cheap controllable light device. 

HullPixelbots at AzureCraft

HullPixelbots on parade

Well, that was fun. It was the first proper outing for my robot army. We were all at AzureCraft in London. It was an absolutely great event, kids getting together to make things in MInecraft. And learn to program along the way.

I'd set up my Robot Arena in one of the board rooms at the fantastic venue. Over the day groups of kids and parents came to take up the challenge of controlling their robots and getting them to line up in the arena with no collisions. Harder than it looked, but everyone who came along was up for the task. Quite a few folks came back for another go, which was nice. 

Great fun. Thanks to the folks at the UK Azure User Group for setting up the event and inviting me along. 

A tense moment as the pixels line up...

Surface Dial controlling a Hull Pixelbot

I've managed to get my hands on a Surface Dial. It's a spiffy new PC control that acts like an, er, dial. You can use it to manipulate value in programs in a very precise and controlled way. The dial works best with the Surface Studio (which I've not been able to get my hands on) but you can use it on any PC which has Bluetooth. It appears as a Human Interface Device and has a really simple API that you can use to make any of your programs dial controlled. 

I wanted to use it to control the movement of my Hull Pixelbot and, after only half an hour or so of coding I had it working. 

It's not a particularly direct form of control just yet, but that is because of the way I'm sending control messages via the Azure Internet of Things hub, which is not really created for such rapid messaging, but it does work, which is rather nice.  I made a "hotel vision" video of the program working. I'm going change the code to make a more direct connection to the robot. 

Of course, what I really want is two dials on the PC, one for speed and the other for direction, but just at the moment you can't connect two Surface Dial devices to a single PC.