Printing Lithopanes

The 3D printed image

The 3D printed image

What it looks like

What it looks like

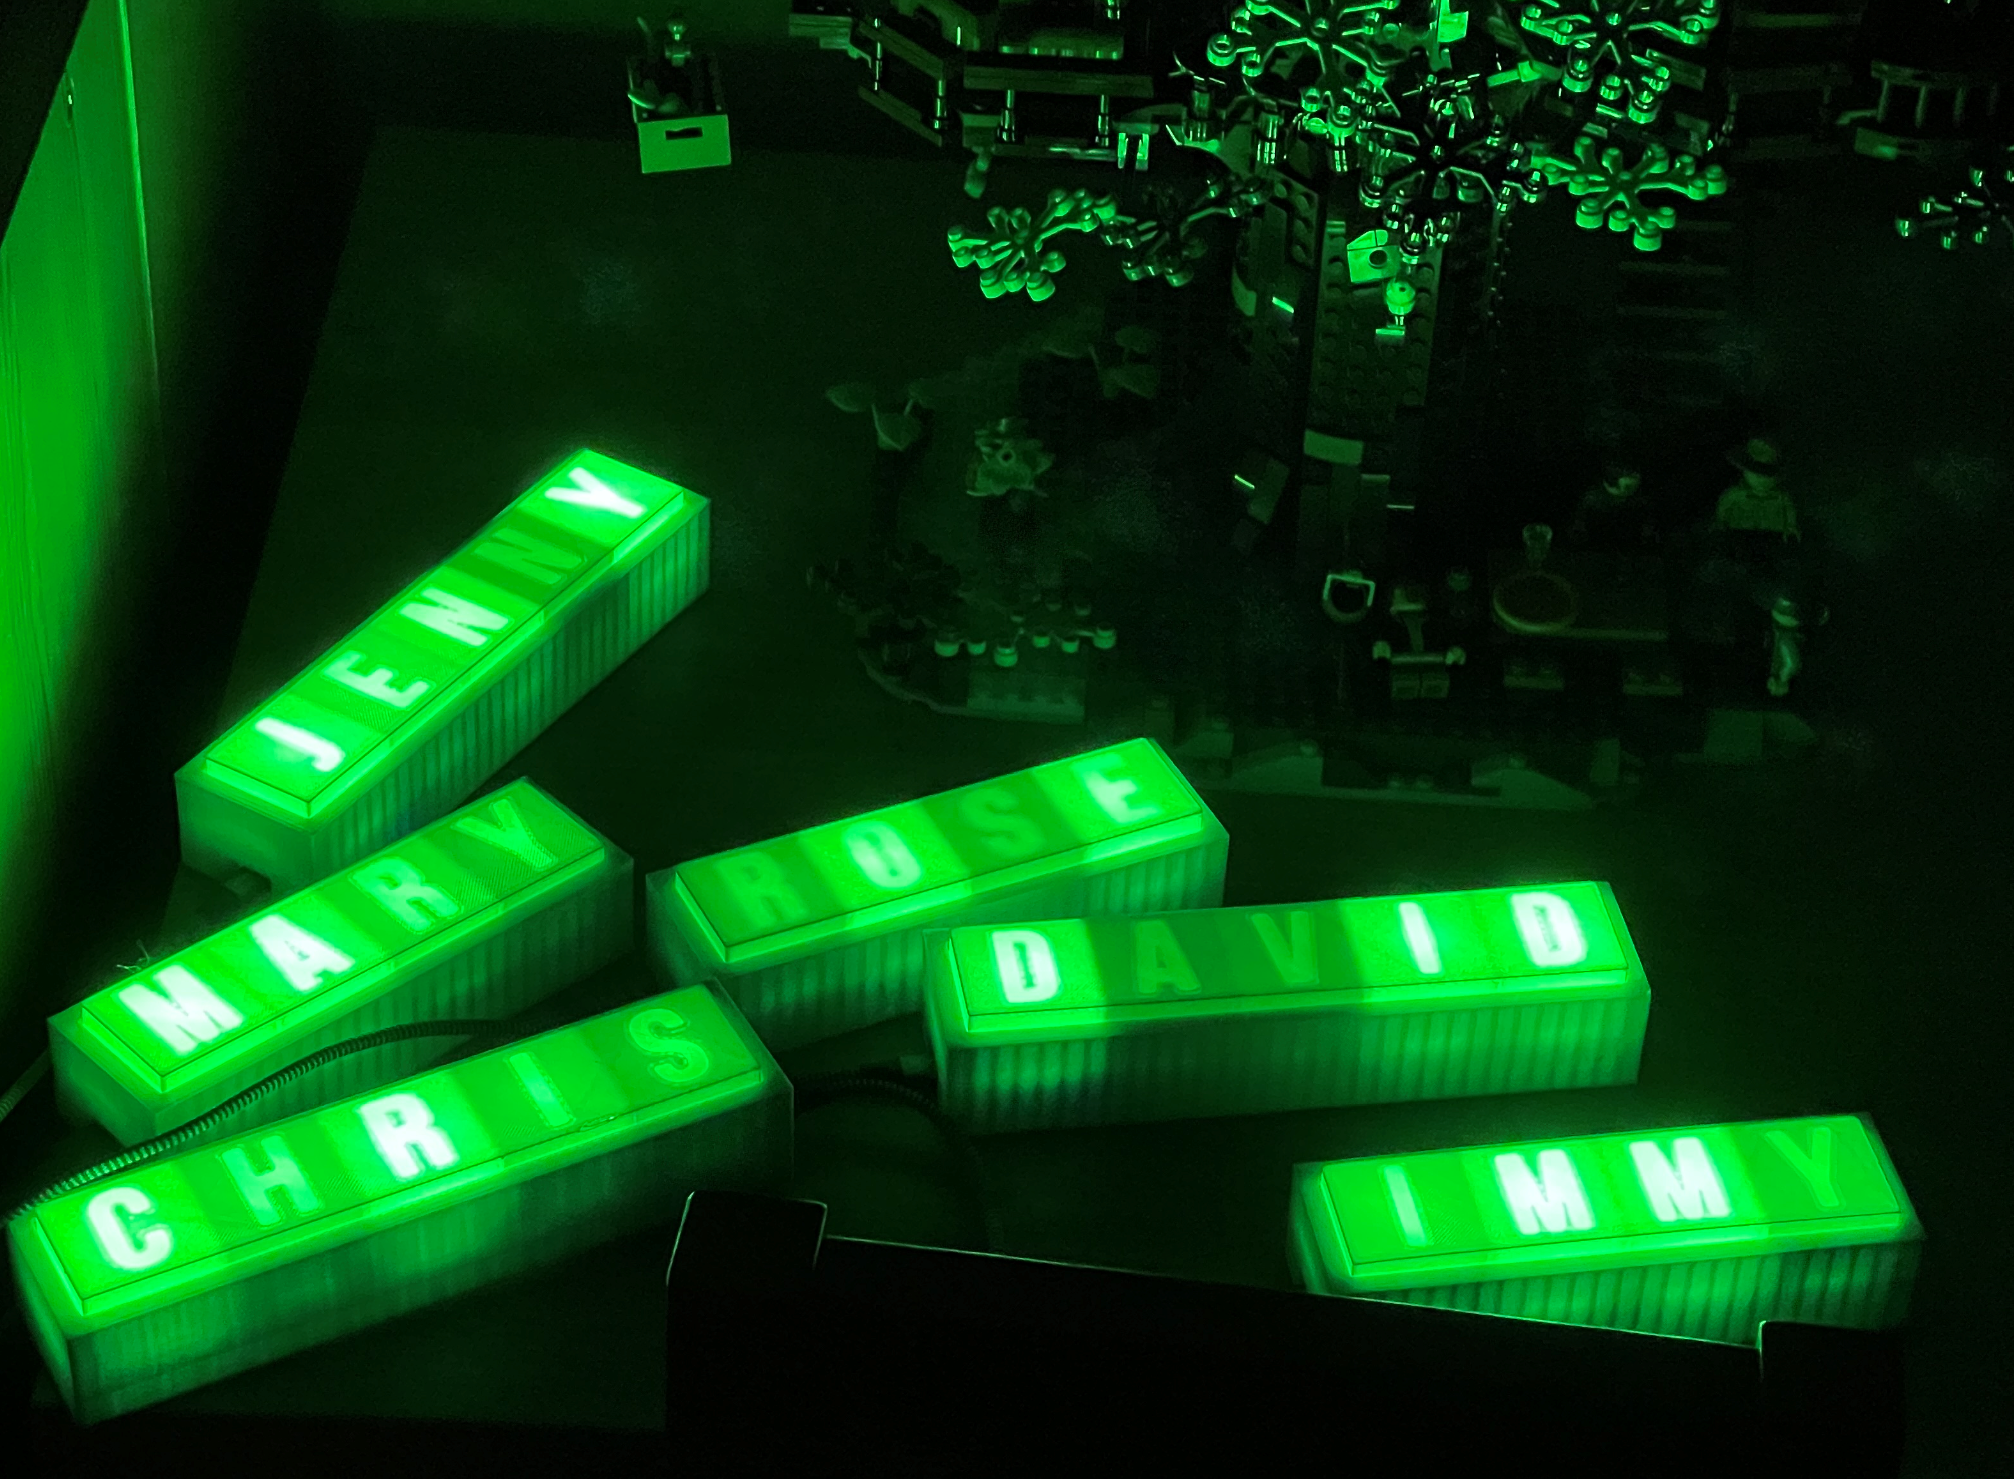
A lithopane is a 3D printed surface in which the thickness of the object reflects the brightness of the image that that point. I’ve done a bit of this kind of thing myself in the past with the Kinect sensor and so I thought I’d try some with the new printer. I used a web based service you can find here which takes an image and provides you with an STL file you can then slice and print. I had a go and I’m very impressed with the result. It’s quite something when a lumpy bit of plastic suddenly turns into a proper picture.

If you want to have a go (and if you have a 3D printer you should) make sure you check the options to select a Positive image. I forgot this vital step and ended up with a negative image after four hours of printing.

The Game of Cat & Mouth is really silly fun

cat and mouth.png

After playing lots of deeply complicated games it’s nice to find one that is just silly, frantic, fun. The Game of Cat & Mouth is just crackers.

You use a plastic cats paw with a magnetic spring in the base to fire little balls through the cat’s mouth in the middle. If you knock all the balls in the teeth into your opponents side you win. If you manage to knock out the black nose you win instantly. The game itself is a triumph of design in cardboard, it packs neatly up into a little case .

When you play it you won’t care that much about whether you are winning or losing because you will be laughing too much. Until you lose. Then you’ll want to play again to get your revenge.

It’s deeply silly, and can get surprisingly skilful and strategic. It’s only for two players, but there are variations for larger parties.

Getting the Cube MOT'd

cube.png

I’ve just organised the MOT for our Nissan Cube. This is an important part of car ownership in the UK. The test makes sure that your car is still mostly metal and has working brakes and things, which posed significant problems for a Mini I owned a very long time ago.

Unlike the very first lockdown, this time the garages are all open and MOTs will expire at the set date. The garage where I booked the test had lots of free slots, so I’m wondering how many people know this.

Using ESP32 and ESP8266 with the same source file

If you want to use the same solution on both ESP8266 and ESP32 devices you find that there are a few inconsitencies between their libraries and include files. I've made this tiny set of conditional includes which pulls in the properly named elements for each processor. It also provides a symbol called PROC_ID that returns the processsor ID in a way that can be used in both types of program.

#if defined(ARDUINO_ARCH_ESP32)

#include <Arduino.h>
#include <WiFi.h>
#include <DNSServer.h>
#include <WiFiUdp.h>
#include <WiFiServer.h>
#include <WiFiClient.h>
#include <WiFiClientSecure.h>
#include <HTTPUpdate.h>
#include <WebServer.h>

#define LED_BUILTIN 2

#define PROC_ID (unsigned long)ESP.getEfuseMac()
#define PROC_NAME "ESP32"

#endif

#if defined(ARDUINO_ARCH_ESP8266)

#include <Arduino.h>

#include <ESP8266WiFi.h>
#include <PubSubClient.h>
#include <WiFiClientSecure.h>
#include <ESP8266httpUpdate.h>
#include <ESP8266WebServer.h>

#define PROC_ID (unsigned long)ESP.getChipId()
#define PROC_NAME "ESP8266"

#endif

Just put this at the top of your program and when you build your program it will pull in the files that it needs.

Pandle for free business accounting

pandle.png

If you’ve got a small business or you’re a sole trader you might like to take a look at Pandle. I’ve just signed up for a free account which lets me use their web based services to create suppliers, customers, invoices and all the other accounting paraphernalia that you need to run a company. It has tools that let you produce reports which include the Profit and Loss one (which I think Pandle is named after).

The web based user interface works well and it looks like it will suffice for my modest business needs. If I need the features of the paid service level it only costs a fiver a month. I had a question about the system and it was answered, by a person, within twenty minutes of me asking it. Excellent service.

Well worth a look.

Become a better programmer: Watch this video

This is a great video. I think every programmer should watch it. It was given at “C++ on Sea”, a splendid conference that I’d love to go to one day. But you don’t have to know any C++ to learn from it. The video describes the way that emotions end up in program code. And how to make sure that the emotions that you put in what you write are positive ones.

If I was still teaching I would make sure that all my first year students watched this. And I’d also change the marking schemes for software projects to include some consideration of it specifically. Not because I think you can mandate this kind of behaviour, but because I would want my students to find out first hand the benefits of doing it.

Printing Pocket Operator Cases with Edna

Pocket Operator cases.png

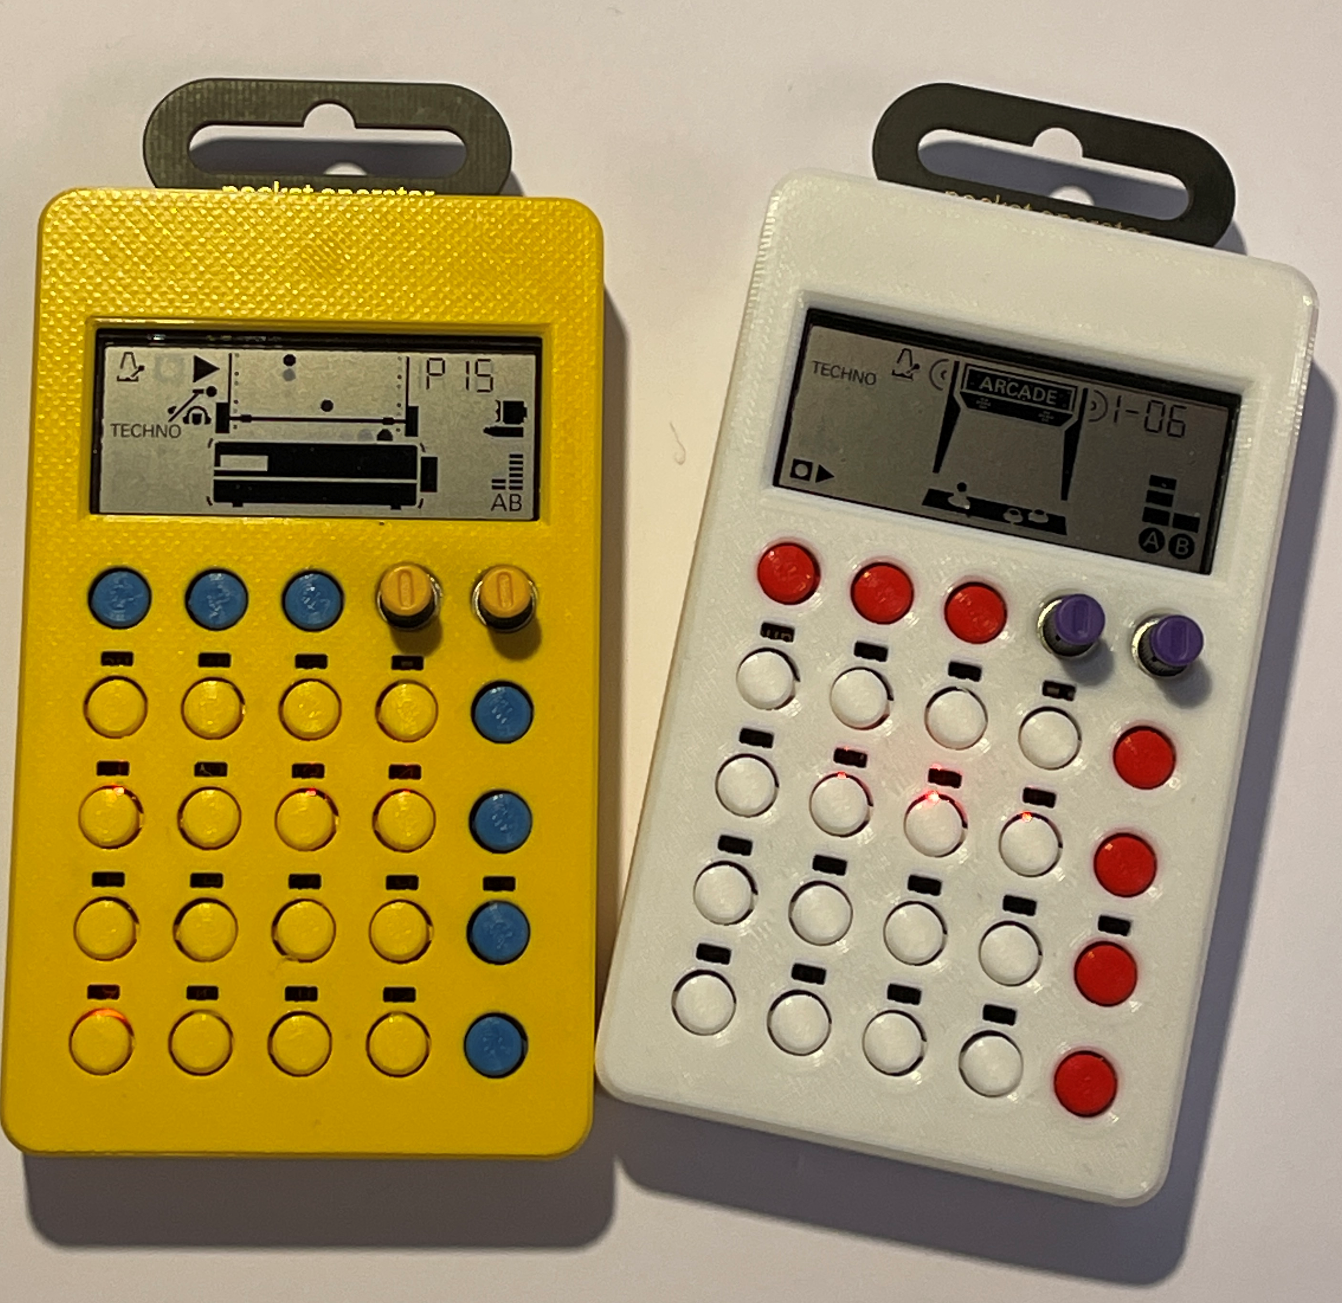
I’ve always had a soft spot for Teenage Engineering Pocket Operators. They are great fun to fiddle with. One of the reasons why I got another 3D printer was to print out cases for them. They are supplied as just a bare PCB with components soldered on and I wanted something with a bit more substance.

It turns out that Edna does a very good job of printing the cases and the buttons from this design. The printer has a textured glass print bed with makes for rather a nice printed finish.

Say hello to Edna

edna.png

I’ve had a 3D printer around the place since 2012. A couple of weeks ago I got my second one. The decision was driven by the results that I’d seen it was capable of, and the unhappy realisation that I would never be able to get my Ultimaker to print to the same quality.

Una star.png

This is my favourite picture of Una my Ultimaker original. I took it in 2012 when I Una and I delivered a seminar about 3D printing. I think the image has a touch of “adoration of the magi” about it.

Anyhoo, time moves on and although Una still works fine (she’s printing something at the moment) I’ve not found a way of persuading her to print fine detail. This is almost certainly my fault. I’ve had several goes at rebuilding the print head but never managed to get the output as good as I now know is possible with one of these devices.

“Edna the Ender” is an Ender 3 Version 2 with the Bltouch auto levelling. She prints very quietly (although she does have noisy fans). She was quite easy to assemble and has produced some very nice prints “right out of the box”. I’m looking forward to finding out what else she can do.

Dominion Online is awesome and free to play

dominion.png

Dominion is a “deck building” game. Each player starts with the same set of cards and at each turn they can use the powers on those cards to do stuff, buy new cards and hopefully a few victory points. As the turns go round you cycle through your deck which means that the you get to use the good cards you have got, along with any bad cards like curses which other players inflict upon you.

In real life this kind of game can be a bit of a pain to play, what with the constant shuffling and dealing. However, it works incredibly well on the computer and you can play with a bunch of friends straight from the browser. Just go here and sign up.

The game experience is very good. Pro tip - change the shape of your browser window so that it is taller and thinner (like above) and you can see more details of the cards you’re holding.

It’s completely free to play, it only starts to cost money if you want to buy any of the add-on card decks. And I’m not saying it’s a great game just because I won. Even though I did.

Strings and C++ Warnings

warning.png

When I build code I try to work in a “zero warnings” mode. That is, when I build the code I don’t see any mutterings about stuff the compiler thinks might think is stupid. However, sometimes I get warnings that I don’t think I deserve. For example, I tend to do things like this:

char * name;

name = “Rob”;

I know what I’m doing here. I’m creating a character pointer and then making it refer to a string literal. It’s how big chunks of the control code for my “Connected Little Boxes” work. In the land of C it is OK to do this (- at least I think it is). However, C++ is now all grown up, has a String type and thinks it’s OK to moan at me for doing this.

I’ve got round the problem by telling the compiler to ignore this particular warning:

#pragma GCC diagnostic ignored "-Wwrite-strings"

This is an instruction to tell the compiler disable that specific warning. The -Wwrite-strings bit is how I tell the compiler the warning that I want it to ignore. I did a bit of soul searching before I added this statement. Most of the time I really want to know if I might be doing something stupid. But I reckon this is a case of “greater good” in that it makes other mistakes more likely to stand out.

Using an M1 Powered MacBook to program ESP8266 devices

I’m loving my new M1 powered MacBook Air. The hardware makes a perfect laptop. It just works, goes very fast and is always there. The battery life is more like an iPad than a laptop. It doesn’t run Windows 10, so it isn’t perfect, but I’m slowly getting my head around Mac OS (WHY IS FOLDER NAVIGATION SO HARD???) .

I’m still using the Microsoft tools I use most of the time - Visual Studio Code, Word and PowerPoint all work perfectly. I’m using the Safari browser at the moment, but I’ll switch to Edge when they release a version that uses the M1 processor.

Anyhoo, I’ve been building code on the MacBook for my ESP32 and ESP8266 devices. As I reported a while back, there is a fault with the serial port auto-discover in the version of Python used by Platform IO (my embedded development environment of choice). I got round this by deleting some lines from the Pytool program that caused the error, you can find out more here. Then I hard-wired the name of the target device into my PlatformIO project.:

Mac OS uses Unix style names for its serial ports. If you want to find out the name of the port that your Wemos is plugged into you can use this command at the command prompt:

ls /dev/tty. usb*

This displays a directory listing of all the usb devices that are presently connected. My Wemos was called /dev/tty.usbserial-140. Yours will almost certainly be different.

upload_port = /dev/tty.usbserial-140

Once you know the port you can then add a line to the Platform.ini file to explicitly target this port when you deploy.

I’ve also discovered another issue; deploying a program to an ESP8266 seems to fail with a timeout problem. The best way to fix this seems to be by reducing the upload speed by adding this line to your ini file.

upload_speed = 115200

It takes a bit longer to deploy, but it does get there.

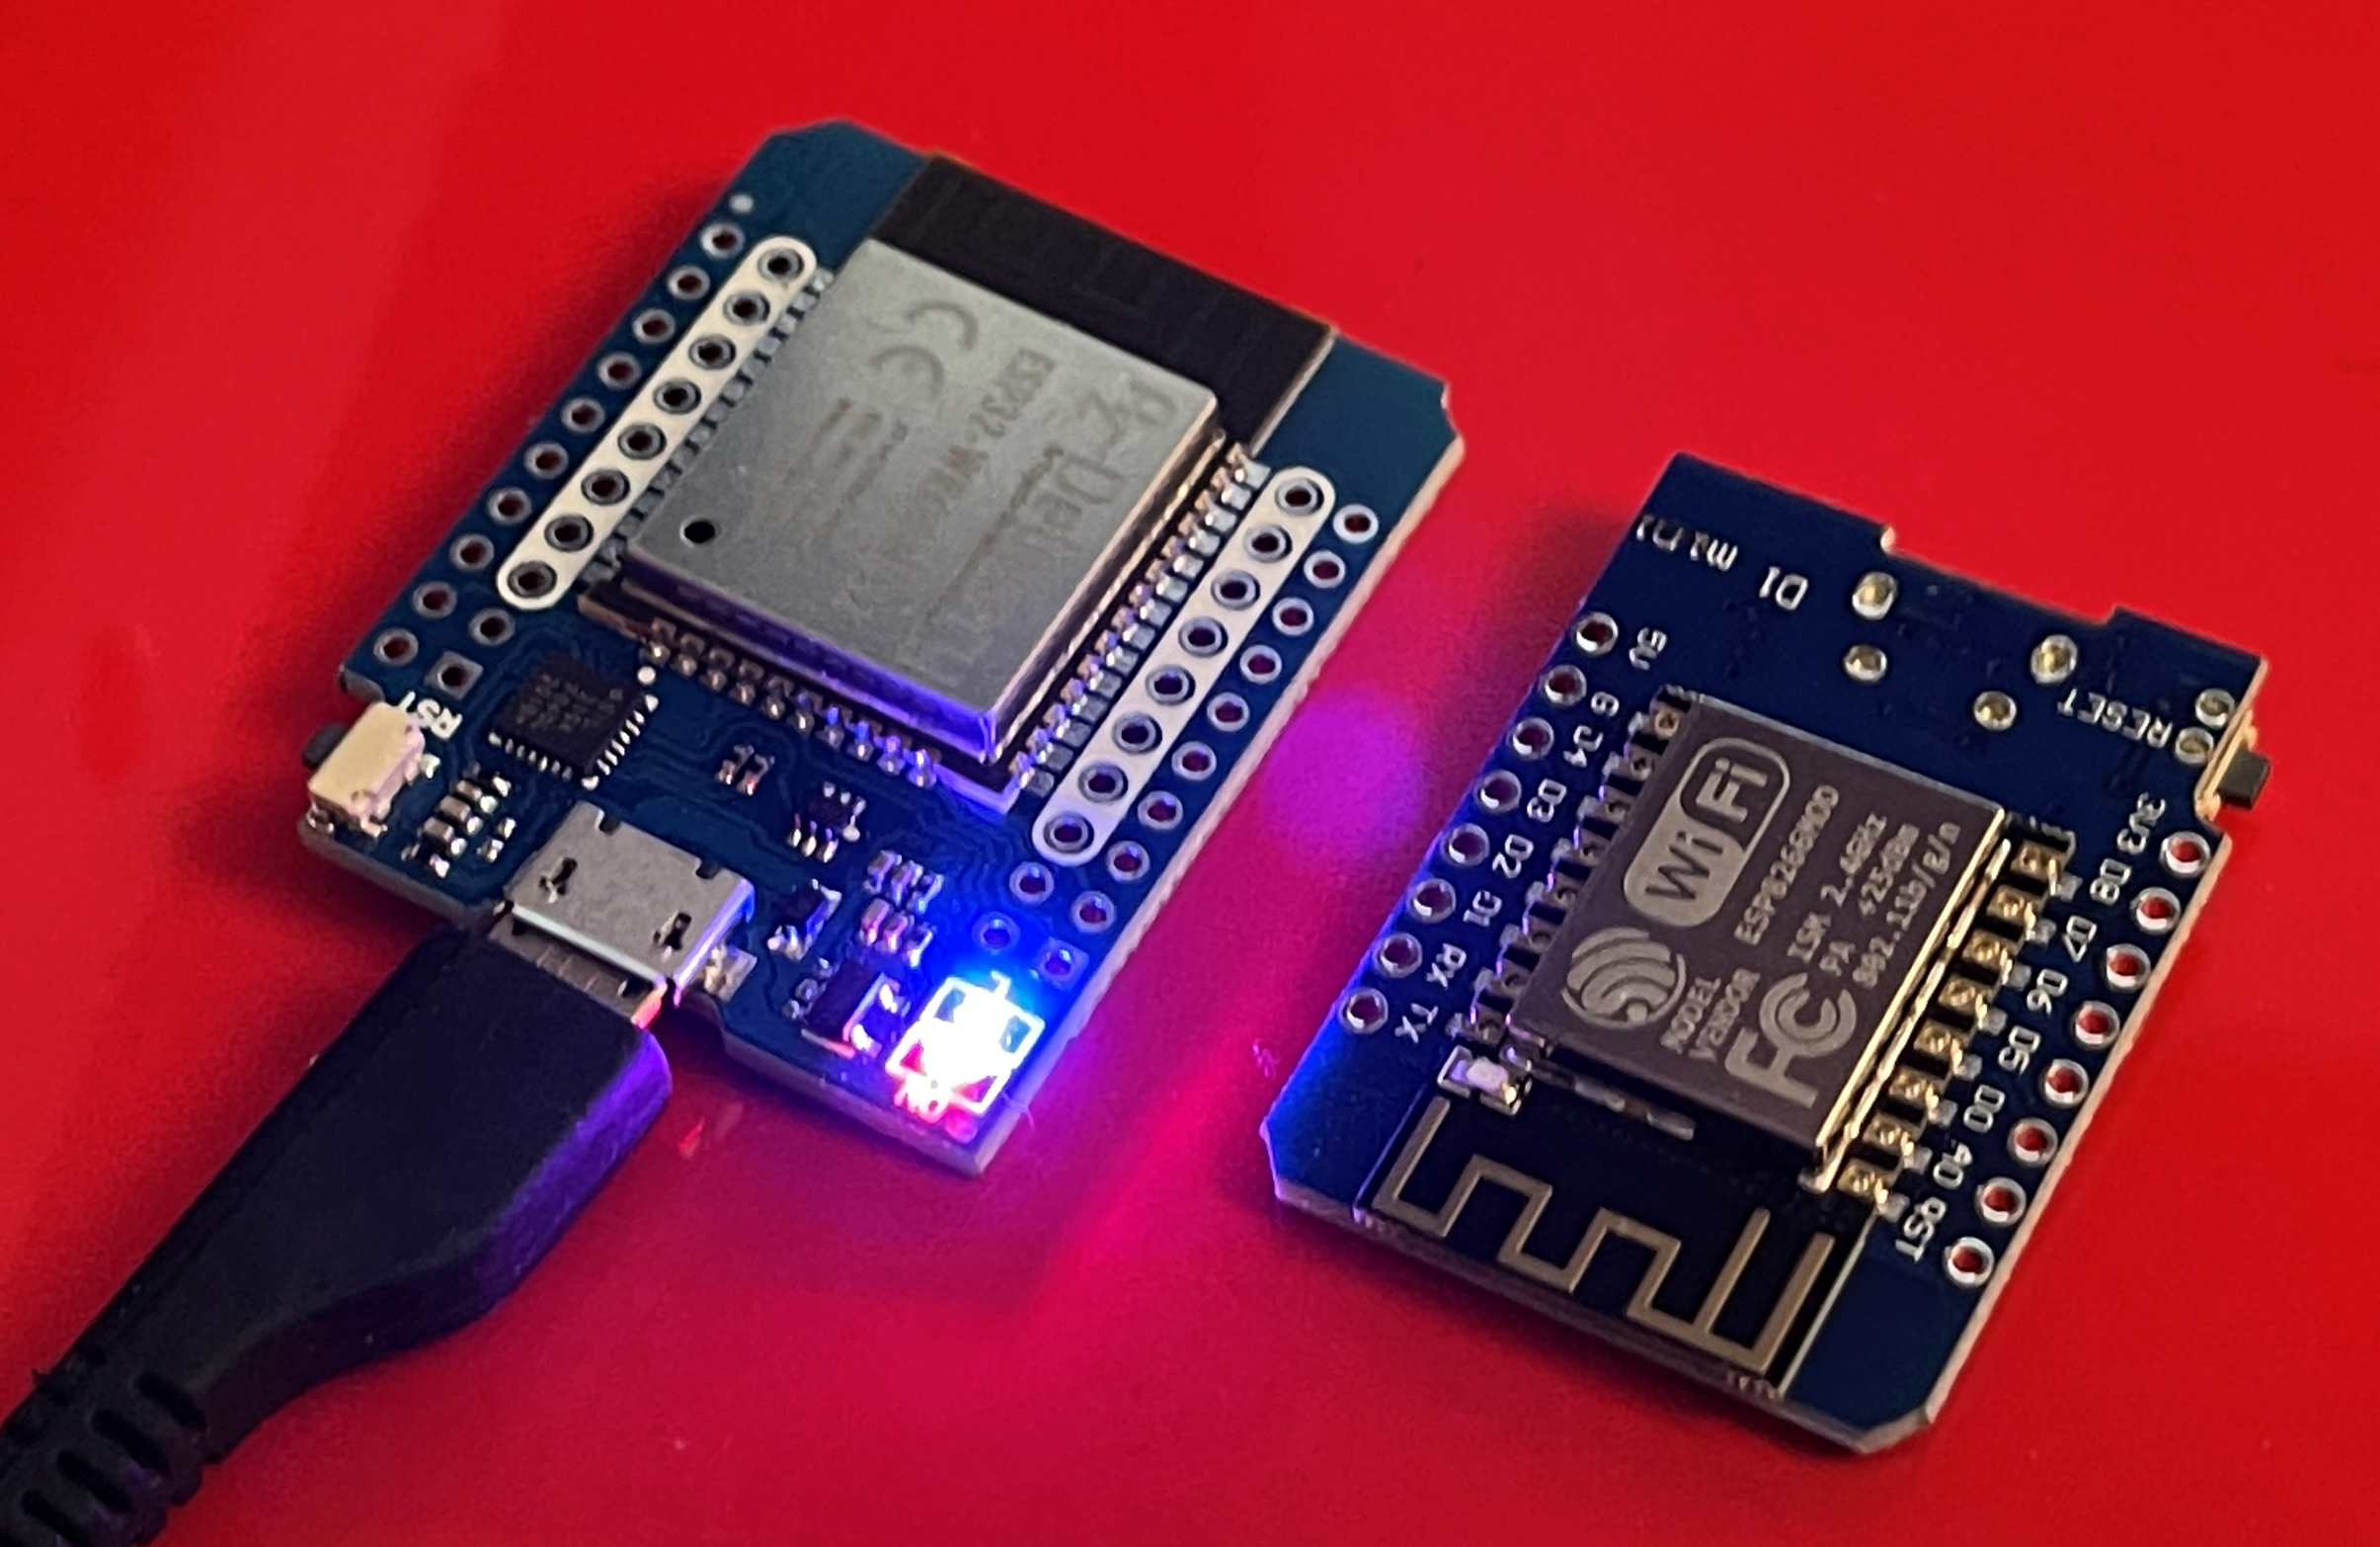
Enter the Wemos D1 mini ESP32

Wemos D32.png

I really, and I mean really, like the Wemos D1 mini. Part of this is because I can get them for under two pounds each, but I do reckon that they make the best connected embedded platform you can get.

Unless you need Bluetooth, or want to talk using secure sockets. Or you fancy writing a MicroPython program longer than a few lines. Then you need an ESP32. Up until recently my weapon of choice for ESP32 applications was the DOIT platform. It’s cheap, it works and it has lots of pins. However, it does have one really annoying limitation. You have to press the program button, or the reset button, or some horrid combination of them each time you want to deploy a program to it.

The Wemos D1 Mini ESP32 doesn’t have this limitation. You can deploy programs and it just works. It has lots of pins but you don’t have to use all of them. It is very similar in size to the original D1 Mini (above on the right), and the pins have been arranged so that you can connect original shields and make them work. It’s a bit more expensive than the original, but well worth the money I reckon.

Neopixels at the Strictly Come Dancing Final

final trophy.png

Like lots of other people I tuned in to watch the Strictly Come Dancing final on Saturday night. I was pleased that Bill Baily won. I saw him live a few years ago and he was awesome. I was also please to see the NeoPixel leds on the Strictly trophy. You can see them on the top of the trophy base in the picture above. I’ve got exactly the same strands in my Christmas lights at the moment…

Using WS2811 Light Strands with the WEMOS D1 Mini

wired lights.png

A very long time ago I spent some time doing stage lighting. Great fun and only occasionally extremely dangerous. Like the time when a friend of mine extended a wire with a plug in extension and he got the plug and the socket the wrong way round. He had the mains coming out of the plug and going into the socket. It was perfectly safe. Until the plug came out…

What has this to do with WS8211 light strands I hear you asking? Well, the strands are fitted with a plug at one end and a socket on the other. Because I know about these things, I decided that the plug would be the connector on the light strand that would receive the power and data signals. My decision was nicely reinforced by the way that the leds had a nice big arrow pointing inwards on this connection. Armed with this knowledge I wired everything up to find that it didn’t work.

Actually, I was kind of expecting this to be the case. Some leds like this need more voltage swing than can be provided by the 3.3 volts that the Wemos puts out. So I used a level converter to bring this up to nearly 5 volts. And of course it still didn’t work. After a bit of testing and a lot of head scratching I did what I should have done right at the start. I tried the led strand with something that was bound to work; in this case an Arduino Uno that puts out 5 volt logic. Of course they didn’t work with that either. So, in a spirit of “what’s the worst that could happen?”, I tried sending signals and power into the socket on the other end of the wire.

Of course it worked. So, if you want to use a Wemos D1 Mini with these led strands just make sure that you ignore the arrows and wiring common sense and send your signals into socket end of the strand. The really good news is that you can probably connect the Wemos directly to the led strand. My leds work without my carefully assembled level converter.

The only other thing to remember is that the RGB order is different for these strands. Blue and white will look fine, but everything else will look wrong because the red and the green colours are swapped. I’ve added a configuration option to allow the user of a Connected Little Box to set the type of leds:

switch(pixelSettings.pixelConfig)
{
    case 1:
    strip = new Adafruit_NeoPixel(pixelSettings.noOfPixels, pixelSettings.pixelControlPinNo, 
    NEO_GRB + NEO_KHZ800);    
    break;
    case 2:
    strip = new Adafruit_NeoPixel(pixelSettings.noOfPixels, pixelSettings.pixelControlPinNo, 
    NEO_KHZ400+NEO_RGB);
    break;
    default:
    strip=NULL;
}

Config 1 is “normal” NeoPixels and config 2 is the settings that work best for the strands.