Winning and losing with the led cube

It turns out that sometimes the only way to find out how to do something is to try and do it. That’s what I’ve been doing today. I’m building a cube out of LED panels. And today I ran out of reasons not to start assembling the parts. Above you can see one of the led panels that are going to be the faces of my cube. I’ve removed the original chassis from the back of the panel and fitted one that I printed yesterday. The new chassis is slimmer and has bevelled edges that let the sides fit closely together.

My printed panel fits exactly (more power to you Una the Ultimaker). I just had to remove the teeny tiny screws that secure the panel to the original chassis and then refit them into the the newly printed chassis. This is a fraught business. The screws engage with really tiny holes in the panel circuit board. If the screws miss their holes they tend to cut through tracks on the panel (that’s one panel broken). If you try to line up the panel with the chassis by pushing a pin through the hole in the pcb board this can catch on the leds on the front of the panel and remove them (that’s two panels broken)….

I managed to fix one broken panel by scraping the paint off and then re-making the connection with a blob of solder. The other panel has three LEDs on one edge which don’t light up red. Oh well. I ordered one extra panel in case of problems like this and I can still use my “broken” one in a picture frame as I just have to crop out that three pixel column from the side. On the whole, I’m going to call this progress…

If you want to see the work in progress I’ll be taking all my bits to the Hardware Meetup tomorrow. You can sign up here.

All Hail the Battery Monster

John came round to see me today. He’s been working on hardware for our environmental sensor. We’re hoping to put a few of these around the village to get a feel for particle counts and how they change over time. The aim has been to create something that can be left on a building for as long as possible and just work.

My experience with making these devices is that power is often your biggest problem. Our lamppost sensors have it easy because they can use a local power supply. But our devices are going to be self contained by the cunning use of sleeping software and the biggest batteries we can find. John has put together the above. It should run for a few months or more.

With a bit of luck we should have them out and about soon.

The Edge browser is ready for prime time

For a few years now my browser of mostly choice has been Google Chrome. I say “mostly choice” because I don’t really want to use it, but it is the one browser that most things seem to work with. The Edge browser had a few advantages. The two main ones were that it was a tad faster and wasn’t linked to Google. However, it also had problems where it would not quite work with sites, which was super annoying.

However, the new Edge is based on the same rendering engine as Google Chrome. And I find runs it faster than Chrome. And I can be fairly sure that it isn’t sending all my browsing activity back to Google. “Oh yes.” I can hear you saying “Instead it is sending all your browsings back to Microsoft”. Well, that might be a bit true, except that the default reporting settings for Edge give me a bit more confidentiality. And the settings themselves are much easier to manage. And furthermore, I reckon (said the Microsoft MVP) that Microsoft has a relationship with its customers which is also based on making stuff/services and selling them, which I think is much healthier than trying to figure out what I want and then selling these leads onto other companies.

Edge is still in beta, but I’ve been using it as my “daily driver” for the internet and it works a treat for me. You can find it here.

Super Mario Party for Switch is awesome

It’s a measure of the greatness of this game that I really like it even though I’m not that good at it. And we’ve only really played the mini-games. And there are lots of things we’ve not unlocked.

It works best if there are four players so you’ll need to get four controllers from somewhere. But once you’ve done that a whole slew of fun and games awaits. The mini-games are both crackers and genius at the same time. Anyone looking for tips as to how you can take simple gameplay ideas and realise them perfectly should take a look at this. We’ve not played any of the longer games, or even any of the structured activities. Instead we’ve just picked things out the roster of minigames on the basis that “this looks interesting and fun”. And we have hardly ever been wrong.

If you’ve got some folks coming round who like silly games you should so get hold of this. It might be worth waiting for a low price deal (that’s what I did) but if you want to get cracking right away I think it is well worth full price.

Playstation Controller Back Buttons

Number one son is in town for the weekend. We went shopping today and he bought something rather interesting. Back buttons for the PlayStation 4 controller. They are a nifty moulding that fits underneath between the controller sides. By cunning use of a moving plug they wrap themselves around to make it look as if they are part of the controller. They provide two extra buttons that are really easy to press with those fingers that normally wrap around the controller to hold it. They are configured using a tiny OLED screen and a single button. You can get them to produce a button press that is mapped onto any of the other controls.

For example, you might replace things that are rather hard to do, like pressing in the thumbsticks, with rear button presses. And some actions, for example change up and down the gears in a driving game, are crying out to be put onto controls like these.

They work with all existing games because as far as the game is concerned there is nothing new happening. The game is getting the control inputs it is expecting, but they are being triggered in a different way.

I’ve been told (quite rightly) that I don’t play games at the stratospheric level for such add-ons to really pay off for me, but if you want to do things like shoot when jumping or easily change gears, they are worth a look. Apparently in the UK they are being sold exclusively by Game.

That could have gone better...

Una, my 3D printer has been behaving wonderfully over the last few days. She’s been turning out beautiful speaker covers. I knew it had to end sometime…. The above print is my first attempt at a panel support for the LED cube. It’s a right old mess. I used “gyroid” support because it sounded cool. That might have been a mistake. But the bigger mistake was to print the whole thing upside down. This means that all the support is in the wrong place, impossible to remove, and ruining the top surface. Hopefully it will print better next time.

Hardware Group Meetup - Frekvens and LED Cubes

I thought it might be fun to add some themes to Hardware Group meetups. The next meetup, on Thursday 20th of Feb, will be about Ikea Frekvens hardware, among other things. I’ll bring along my speaker, so folks can get an idea of how good it sounds.

I’ll also be bringing along my LED cube work in progress. I’m working on making a cube out of 64x64 led panels. The idea is to have a Raspberry Pi 4 inside, along with a fairly muscular battery, so that the device can be totally mobile, just a cube that lights up. I’ve got my panels, so now I’m printing out all the support pieces from this amazing design. I’ll be bringing my work in progress along to show off.

The event is free for anyone who fancies coming along. You can get tickets here.

A look at Frekvens - and a printable speaker cover

Frekvens is a very interesting collaboration between Ikea (who make nice stuff) and Teenage Engineering (who make amazing stuff). The range of Frekvens branded items includes lights that flash in time to the music (always a winner), speakers, a nifty tripod, a drum you can sit on, some furniture and even a shiny raincoat that I think I’ll pass on.

We happened to be in Ikea on Monday and they had some Frekvens stuff on sale. After agonising for a nanosecond about whether or not I should get some in the end I plumped for a speaker/subwoofer combination and a couple of led light arrays. The neat thing about the different components is that you can create your own configurations simply by bolting the different elements together.

Each item has sockets for power in and power out and comes with a curly extension power cable that you can use to “daisy chain” up to seven or so devices together.

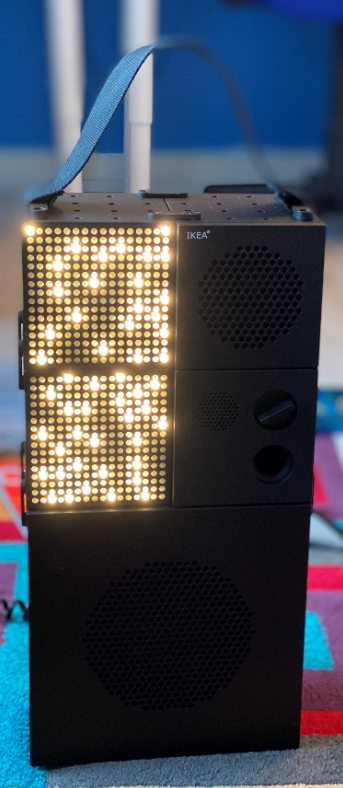
The speakers have both audio in and audio out connections so you could wire together a monster speaker array if you wanted. I went for the configuration you can see above, with the bass speaker at the bottom and the main speaker on the right. If I get bored with this I can re-arrange, or even separate the components.

The sound quality of the speaker belies their comparatively low cost. They work very well over Bluetooth (although they have line-in too). They will pair with up to 8 devices. If you buy a couple of batteries ( one for the sub and one for the speaker unit) you can make the speakers completely portable. Unfortunately the led lights need mains power, but you can’t have everything.

The led arrays have a bunch of different sound-triggered displays. They use an internal microphone to trigger the animations and they work really well, especially with John Mayer songs for some reason.

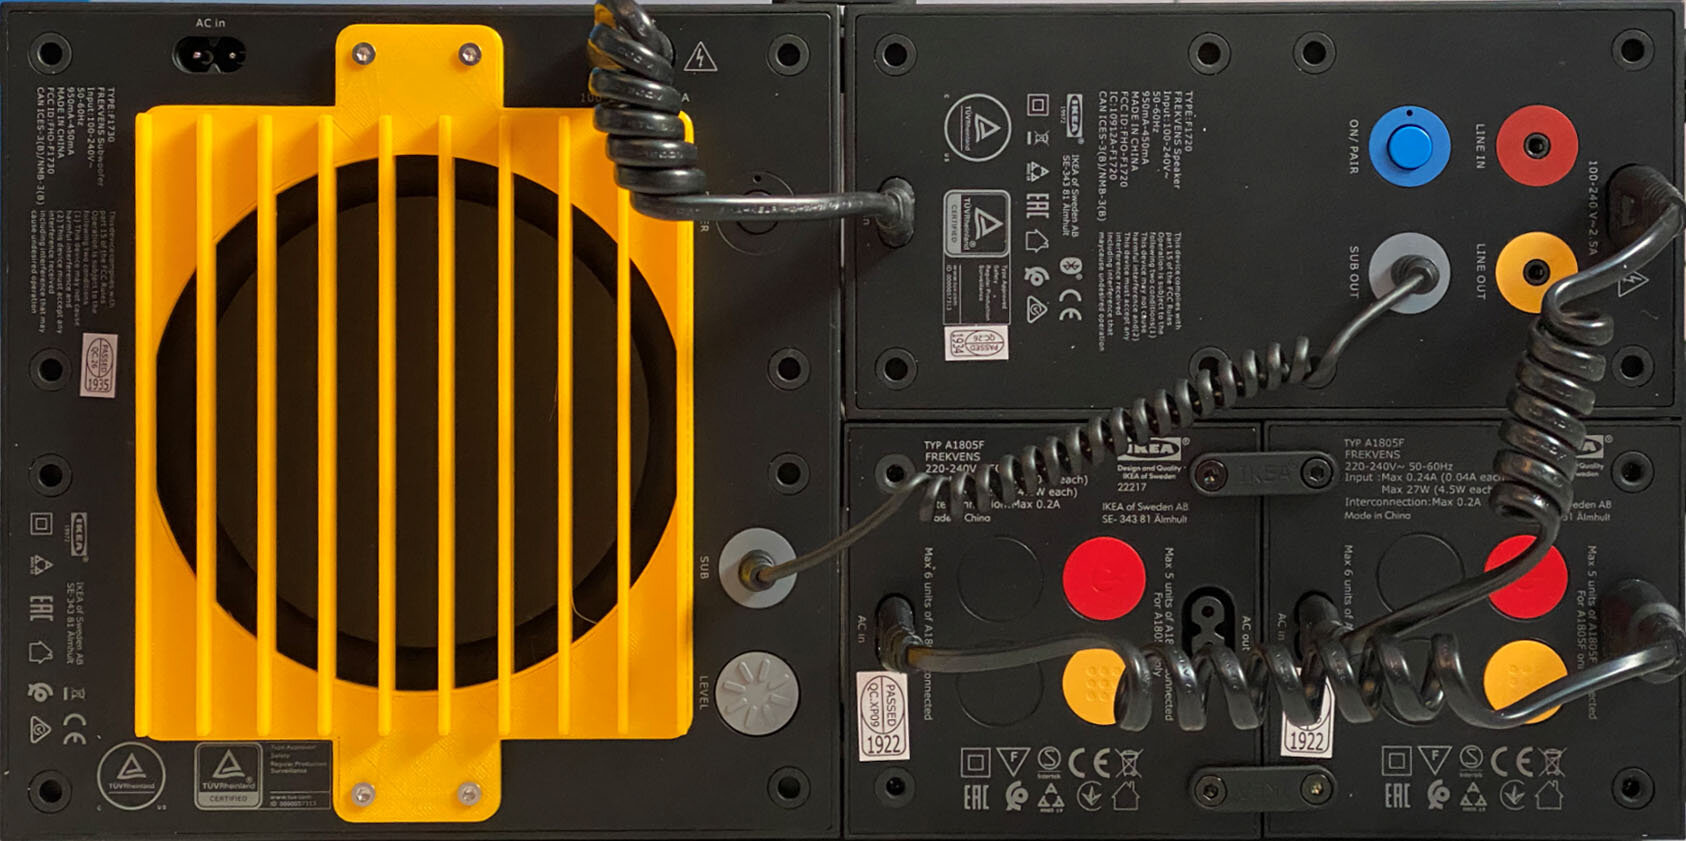
If you have a 3D printer there are some designs available that you can use to make your own custom handles and fittings. However, there was one thing they didn’t have. The subwoofer contains two driver units. One can be protected behind a removable cover, but the larger rear one is completely unprotected. I didn’t like the idea of this much, so I fired up OpenSCAD and set about designing a cover.

This is the cover fitted to my speaker.

If you have a speaker and you want to print your own cover you can find the designs on GitHub.

I love the thinking behind Frekvens. The interconnection possibilities are interesting, as is the way you can design and integrate your own panels and accessories.

If you are in the market for a funky party speaker or want to jazz up your trendy pad they are well worth tracking down.

Led Panels on the way

My dreams of a led panel cube have been on hold for the last couple of weeks while I wait for the panels to arrive from China. Today I did something I should have done a while back. I did some digging to find out what was going on. Turns out that my local Parcel Force depot had sent all the letters about a customs payment to the wrong address. This raises a couple of depressing thoughts:

  • They must have a process where a post person reads the address off the parcel and then enters it into a different system to send out the letter. Amazing. Rather than have something automatic they have a process which is guaranteed to introduce errors every now and then.

  • Rather than pondering why I might not have responded to their first letter and maybe checked that the address they were using was right they just sent another reminder to the wrong address. So, once they have got a system that is prone to failure they then take no action when it might be possible that it has failed.

Anyhoo, if you have an AliExpress (other suppliers are available) package that seems to be stuck it turns out that sorting this out is very easy.

  1. Use the ParcelForce site to find the package – the Aliexpress tracking number works here: https://www.parcelforce.com/track-trace

  2. Find the depot phone number. York Depot is: 01904 888512, you can find other depots here: https://www.parcelforce.com/depot-finder

  3. Ring the number. They just need your postcode and you can pay the duty there and then.

The panels arrive tomorrow. Here’s hoping.

Plumbing the depths

Recently our electric shower has been indicating that it is not a well machine. Last week a lever linked to the power button fell off and in recent days the shower has been making the kind of noise that X-Wing Starfighters make just before they crash into the ground. And today the noise acquired a new rumble that wasn’t there before. So I guess it is new shower time again.

I’ve been installing new showers for ages. Sometimes with jetlag. Maybe I should find a more reliable brand. For me the key thing about shower fitting for me is that putting the new shower in place is the easiest part of the process. Getting the old one off the wall can however be problematic.

The shower has these highly efficient pipe gripping fittings. One of the best parts of the installation instructions is the bit where they advise you not to push your finger into the pipe hole. (I was of course instantly seized with an urge to do just that). The pipe grips are based on a Chinese finger trap design. The harder you try to pull the pipe out, the tighter it is gripped.

In fact, they grip so well that every new shower is supplied with a “push fit release tool”. The diagram above (which has to be studied very carefully) shows how the tool can be used to release these grips. However, if you use it wrongly you just end up with a bunch of skimmed knuckles and a shower that is even more firmly attached than before.

If you ever find yourself removing an “Mira Event XS” remember that the special tool should be placed on top of the fitting and then pushed vertically down to release the grip. You should not push the release tool into the enticing little gap underneath the fitting and try to use this to force the fitting up.

Of course, if this thing fails (and it will) you end up like me, trying to solve the problem by placing an open-ended spanner on top of the fitting and hitting it with a hammer. This will either release the shower from the pipe or give you a new problem so large that you will forget about all your troubles with shower removal. Fortunately I was lucky this time.

I thought I’d won once I’d removed the shower, but it seems that fate had other ideas. I wanted to replace the hose and the shower rose too. Unfortunately the design department at the shower company had made some tiny changes to shape of the hose so that the new one doesn’t play well with the old fitting left on the wall from the previous shower. So I had to take the wall fitting off. Then I find that the design department has made another change (thanks folks) so that the new fitting only needs one support bolt, leaving me with a couple of spare holes in the bathroom wall. So I had to find an elegant way of hiding these. Wah. It’s almost as if the design department exists solely to make my life more difficult. That can’t be true. Can it?

Anyhoo, the whole thing is now sorted to my satisfaction and we can enjoy smooth and quiet showers again. For a while.

Selling books by mistake

My first and only customer….

I’ve been blogging for quite a while. And the internet continues to surprise me. A while back I wrote a silly post about a book I found in a local Waterstones bookshop. Later I get a message from Erik saying he’d like to get hold of the book that nobody seemed to want. I went back to the store, asked the assistant to find the copy and sent it off. Erik has just sent me a picture of himself with his treasured text.

I really hope he finds it useful. For me it’s really nice that something silly that I did has had a useful result.

Still some tickets for DDD North 2020

Only my mother used to call me “Robert”….

There are still some tickets available for DDD North 2020. Of course, I’m only telling you about the event now that I’ve got my ticket…..

The DDD events are always awesome, so if you are in the area you really should go along. And if you’re not in the area you drive to Hull and then go to the DDD.

I’m not presenting a session this time, but you might get to sit next to me at one…….

Hardware Group Meetup

On the way into the Hardware Meetup at c4di tonight I sprinted off to the waterfront, leaving Brian wondering what I was up to. There was a great big boat going down the estuary and I wanted to grab some pictures. Of course, but the time I got the big camera out and pointing in the right direction the boat had moved downstream a bit, but I still rather like the resulting shot.

We had some really good discussion about hardware and whatnot and Brian showed me how to get started making my own PCBs. The next meetup will be on the 20th of February and I’ll be publishing details soon.

Writing up code as you write it

I’ve found a good use for all that time I seem to be spending waiting for my programs to compile and deploy to my hardware. I’m writing up what I’m trying to do. This is what I wrote today:

  • fixed a bug whereby only the latest reading and not the average environmental values are sent in an MQTT reading.

  • changed the handling of timeout so that an incomplete reading is sent rather than just skipping a reading

  • bug in modification so that the air quality reading was not sent when only the environmental sensor was disabled. This is because the reading age was less than the reading timeout. So a reading taken at the start of the reading period would be "out of date" by the time that the reading had timed out. Fix this by increasing the reading age to 60 seconds. Also modified the reading timeout setting so this cannot be set more than 60, so that a user couldn't cause this by silly settings.

  • added a 1 second delay before powering down after a message has been sent so that we can send MQTT messages to the device when we know it is awake. Managed this delay to ensure that it is none blocking.

  • found a nasty bug in MQTT message decoding that broke the decoding of incoming messages. Put the MQTT message decode into the main thread rather than calling the JSON decoder on the callback which is running on a network interrupt because it broke the Serial.print output. Added better decoding of the message types (better as in working).

Fun with KiCad

After spending a chunk of today with KiCad I have managed to make a schematic. I managed to go from this error…

..to this error…

… to no errors. Now I just have to figure out how to make this design into a PCB.

Note that if you are into hardware development you should probably think about getting into KiCad. It really is a wonderful program. It’s free and it lets you design your own circuit boards.

Close all but this file in Visual Studio

This is awesome. It might have been in earlier versions of Visual Studio, but I’ve only just noticed it. One snag of using the lovely code navigation features is that you can end up with lots of windows open that you don’t need any more. So, now you can right click on the tab for an open file and this very useful menu pops up. Close all but this does just what you want. It gets rid of all the other windows and just leaves you back where you want to be. If you’ve got several panes open (a great idea if you have a wide monitor) it only closes the tabs in that pane.

Very useful.

Fuses from history

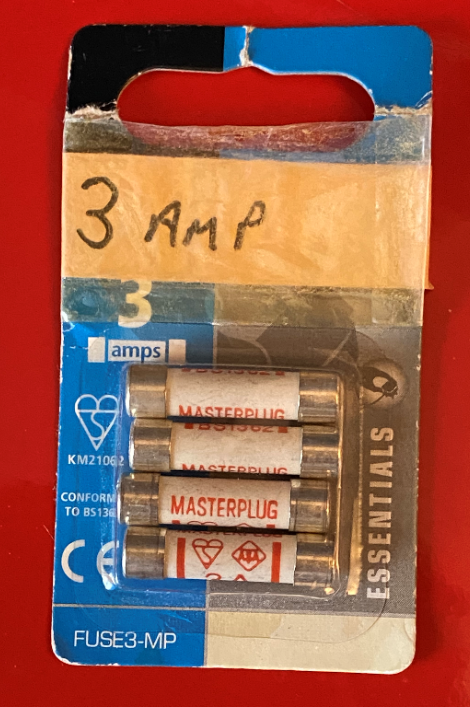
Ian gave me these ages ago. I did a blog post about how I’d put a 3 amp fuse in the microwave with predictably hilarious results. Next time he saw me he gave me a couple of packs of fuses with great big labels on them (as if their different colours weren’t enough).

Anyhoo, today I actually used one of them. The bulb in my lovely magnifying lamp failed and as a parting shot it took out the fuse in the mains plug. So I finally had a use for a 3 amp fuse.

Thanks again Ian.

18th Hull Raspberry Pi Jam

I went to the 18th Hull Raspberry Pi Jam today. It was great. They had loads of Raspberry Pi machines set up and a lovely exercise wiring up neopixels. Everyone who did the lab was knocked out by how easy it is to create and control coloured light displays from software. I was showing off the work in progress for my LED Cube, which is presently two of my older panels connected to a Raspberry Pi and displaying demo images. I’m using this software to drive the panels and it works a treat.

I was telling anyone who would listen (there were a few) that the panels I really wanted to use were stuck in UK customs. I’m really hoping that soon they will be released, I can pay whatever hefty duty they figure out that I owe and I can get on with building the device.

Then I got to talking to Jon about his recent project which involved making an awesome piece of artwork. For his next one he’s going to be using a coin mechanism. These are the devices that you find on fruit machines and the like. Apparently you can buy them from Ali-Express for not much money. So I’ve bought one.

You configure the mechanism by setting it in “learn” mode and then inserting loads of a particular kind of coin. It can remember three different types of coin and the output is a simple sequence of pulses that should be easy to pick up with an Arduino or Raspberry Pi.

I’ve absolutely no idea what I will use it for. I was thinking of taking it to a hardware meetup and offering people the chance to see if it recognises their coins:

“Lets see if it can recognise your two pound coin. Oh, bad luck. Sorry, no I can’t get your money back again.”

If nothing else, this could be a nice little earner. The device has cost me considerably less than a computer game and I think I’ll have at least as much fun with it.

The next Raspberry Pi Jam (which I think will be the 19th), is on the 14th of March. This upsets me, because I would really like to go but I won’t be able to make it. Kudos to Jon and Matt who organised the event, provided the coloured pixels and then helped everyone to make them light up.