Pi Zero Version 2 Released

The Pi Zero has always been a favourite of mine. It’s a bit hard to get hold of sometimes, its frequently out of stock and they only let you buy one at a time. I don’t see that changing any time soon. They’ve just released version 2 which delivers a serious boost in performance, they say up to the level of a Raspberry Pi 3. It has a 64 bit architecture and four processor cores along with a general speedup of around 40%. I’ve been planning on making Pure Data output device to use with the PICO MIDI cheese box. It looks like this would be the perfect candidate.

Not Halloween Hardware Meetup

Some of the gear on show. The black BANDS on the cube are due to the shutter speed of the photo.

We had our first Connected Humber Hardware Meetup for ages today. Those lovely people at Hull MakerSpace provided the venue. It was lovely to actually meet up with folks again. We had a great time. It was splendid to see some new faces as well. I’ve promised a bunch of lights in names unites to people (as long as your name is less than 6 characters long I can make it work).

It’s hard to make long term plans just at the moment, but we’ll definitely be having another in-person meetup at some point. If you want to come along to the next one (and maybe get lights in your name) you can keep track of what we are doing here.

Ghost Blitz will make your brain come out of your ears

We found the German version to be slightly cheaper

Ghost Blitz is a game for all the family. The rules are quick to learn and just about anyone can pick it up. You get five nicely made little wooden pieces: green bottle, grey mouse, red chair, blue book and of course a white ghost. There is also a deck of cards with pictures of the objects on them.

To play the game you shuffle the deck and then turn over one card at a time. The card shows a bunch of pieces and players must identify either the piece that is correctly shown (for example if the picture shows a blue mouse on a red chair the correct answer is red chair) or the piece that isn’t shown (for example if the picture shows a red mouse holding a blue bottle the correct piece is a white ghost because it can’t be anything blue, red or a mouse or a bottle). If you get it right you get to keep the card. After a run through all the cards the player holding the most cards wins.

These simple rules make for fiendish and brain bending gameplay as you struggle to force your grey cells to reach the answer before anyone else. I wouldn’t want to play it for too long. I think my head would overheat or something, but for a quick blast, especially with kids, it is a hoot. The components are very compact and it would make a great travel game.

Polaroid SX-70 camera tips

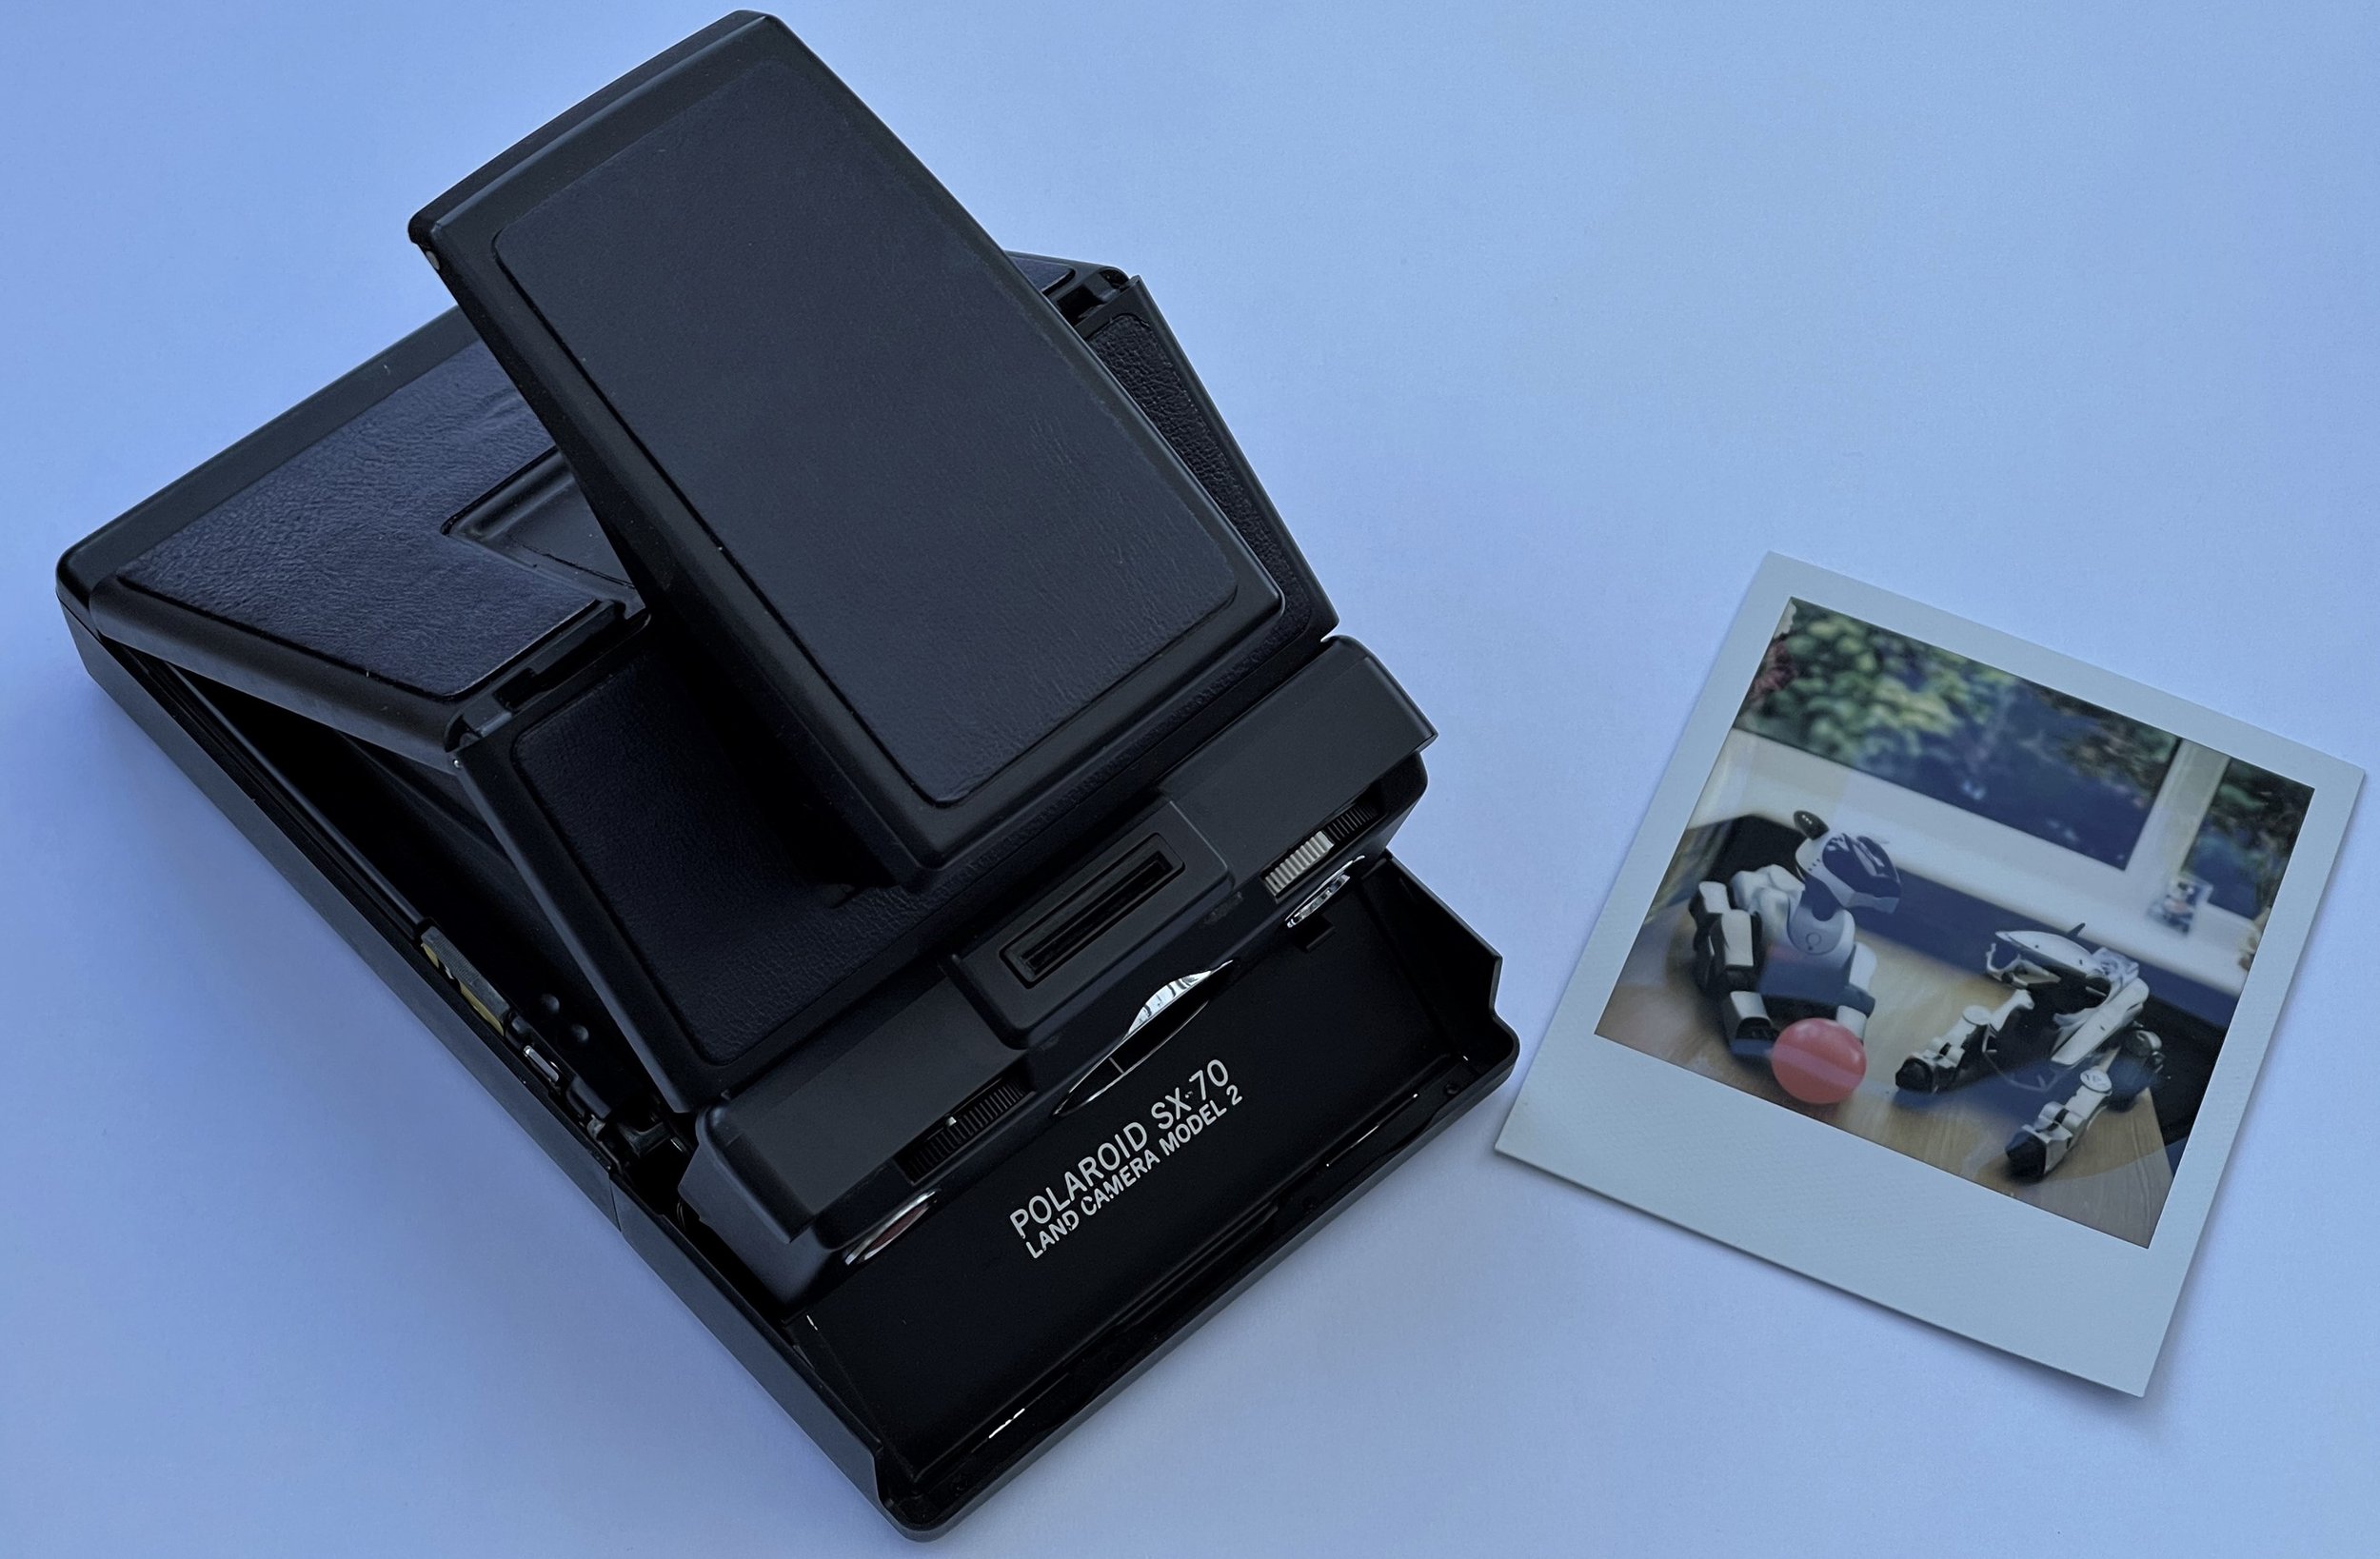
My “new-old” camera arrived last week. It’s the one that I’m selling a receiver to pay for. It’s a Polaroid SX-70 which was made in 1974. So it is very old. Up until a few years ago such cameras were completely useless as Polaroid had stopped making the instant film that they used. However, the Impossible Project (which has now assumed the Polaroid mantle) stepped in and started making films again. So a whole new generation can now discover the joys of instant shooting using a fold-up single lens reflex camera with an really nice glass lens.

I’m probably going to have to sell a few more things if I want to take lots of pictures with it though. Every time I press the shutter it costs more than two pounds to produce a single colour photograph. Which might be blurred or too dark or light. I’ve taken 8 pictures so far and I’ve only had a couple of duds. Pro tips for using the SX-70 that I’ve discovered so far..

  • make sure the focus is sharp in the viewfinder. Use the rangefinder prism (if there is one) to check.

  • Make sure you fill the frame. It’s square which means that you might find you only put your subject along the bottom (see above). Note that the rangefinder prism doesn’t mark the middle of the frame, it is towards the bottom. This can confuse your framing efforts.

  • If you are going to get exposure wrong, try to under-expose so that things come out a bit darker than they should. If they are over exposed they are just blown out to a white part of the image. If things are bit dark they look moody, which you can sometimes get away with. You can twiddle a little adjustment towards the dark side to do this.

  • Get the picture out of the light as soon as it comes out of the camera. Put it in an inside pocket (or even under your armpit) to give it somewhere warm to develop. After a few minutes you can take it out and have a look at what is appearing, but do this in a shady place.

In absolute terms the pictures that the camera produces are not that great. Your phone will be able to beat them for sharpness and colour. But that is not the point. These are tiny little works of art. You have to work hard to get a nice one and when you do the feeling of accomplishment is great. I’m enjoying taking very few carefully composed pictures rather than my usually process of taking a bunch with the view that I might find one or two good ones when I get the camera home and download the files.

The Good Life is good fun

The Good Life first appeared on Kickstarter but has now made it onto XBOX Game Pass. You play as a somewhat desperate photographer/investigator working off a 10 million pound debt. How she got the debt is not revealed at the start, perhaps we find out later. Anyhoo, you have been despatched to the Lake District to discover the dark secret behind “the happiest town in the world”. One secret emerges pretty quickly, others will take a bit of time to emerge. While you wait you can earn money by taking photos and building up an on-line following.

Number one son says that the developers were in the Lake District taking pictures while we were on holiday there. Not sure about this, but the artwork gives a nice sense of place and the voice acting is good, if a bit eclectic. It’s a great game to pay socially, you can all watch the play and discuss what is really going on. If you’ve got Game Pass you should have a look.

Watch Baking Impossible

If you happen to have Netflix and like baking and engineering you should watch Baking Impossible. It’s basically the Great British Bake-Off but with teams that contain a baker and engineer. In each episode rather than making a slightly different kind of cake, the teams have to build engineered contraptions which are then tested at the end of the program (with sometimes hilarious results).

If you have kids who like baking, but don’t know much about engineering (or vice versa) you should watch it with them. The challenges are interesting and the things that the teams manage to make are sometimes astonishing.

Air Quality sensor autopsy

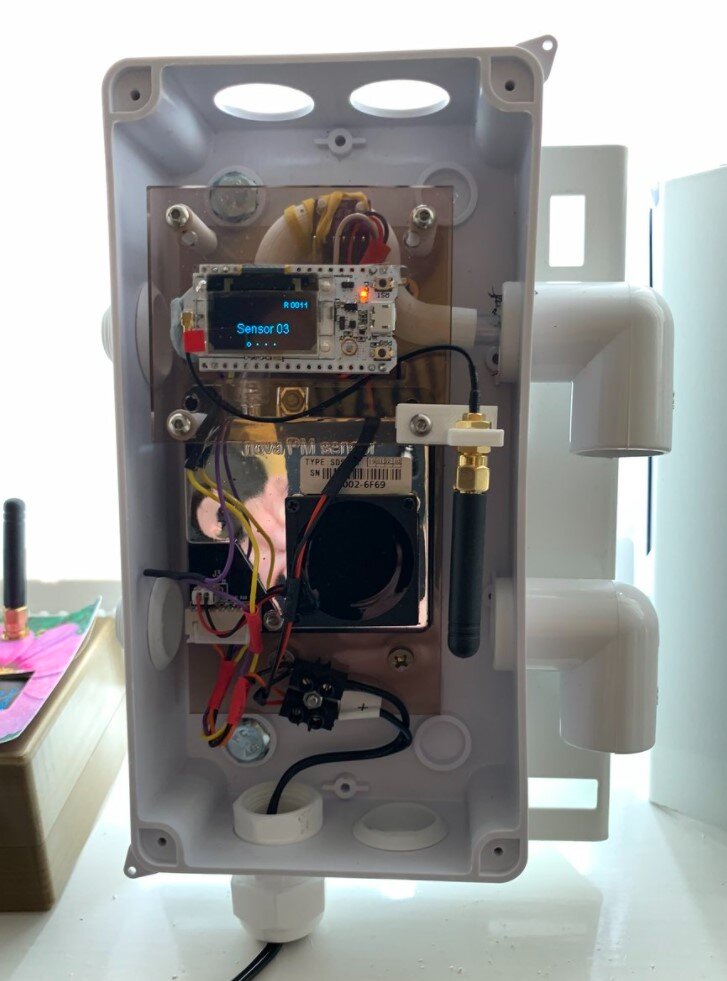
Actually, it’s a bit unfair to call it an autopsy, what with the sensor not being dead. I applied some power and it sprang into life, producing readings that seemed quite sensible. The components that had suffered the most were the four screws that held the lid on. I thought these were galvanised steel, but they are now very rusty steel, to the point where one screw head has pretty much disappeared.

However, once I got the lid off I discovered that the internals look pretty much like new. There is a bit of burn-in on the OLED screen (you can see it on the top right hand corner) but everything else looks fine. The waterproof case has done a good job of protecting the innards. The air quality sensor is only turned on a few times each hour to take readings, and it worked fine giving reasonable readings.

This is the air inlet. I was expecting to see more blockage than this. The filter we used was an inlet filter for a washing machine hose which we glued into place, and it seems to have done a good job of keeping out creepy crawlies. The next thing might be to take the air quality sensor to pieces and take a look at the state inside that. The sensor fan sounds fine, so it might be good for a while longer. From this assessment it looks like we can build things, stick them on lampposts and have them survive for a useful amount of time.

Making a node.js Cloud Application in Azure

I solved my Heroku problem from yesterday. I’d added some new .env setting values but not copied them into the Heroku application. So when the app woke up on the server it instantly fell over because lots of things were not set properly. The app was soon working fine, but it did have one problem. Heroku turns an application off if it has not been used for a while. This is usually fine. It will be started next time someone visits the site. However, at the moment my app also monitors MQTT and registers devices when they connect, so I need to have it running all the time. You can stop an inactive app from being switched off, but this involves spending money on a paid service which, being a Yorkshireman, I’m not keen on.

Instead I thought I’d try hosting the application on Azure, where I have some credits (not that I expect it to cost a lot). I followed this tutorial (or at least the second half of it) and in no time at all I had something that didn’t work. Oh well. The error was interesting. Azure didn’t know where to start. I was a bit confused because exactly the same code was running fine on Heroku. It turns out that I needed to add a start element to the settings in package.json:

"scripts": {
    "devStart": "nodemon server.js",
    "start":"node server.js"
  },

I think that Heroku just finds the nearest .js file and runs it to start an application if one is not specified, whereas Azure is a bit more careful. Anyhoo, after this I now have a management interface for all my devices.

This is the control panel for one of my little boxes. I can modify the device settings, see when it was last connected and send it commands to do stuff.

It really is incredibly easy to make your own node applications and deploy them like this. If you don’t care about app timeouts you can build and deploy something entirely for free. The integration of the process in to Visual Studio is very impressive.

I put the app onto a paid subscription (around 10 pounds a month) and then twiddled the application settings to make it always on. Great fun.

I quite like it when things are difficult and confusing

This may sound crackers, but bear with me here. Sometimes I do something and it just works. It’s a rare thing for me, but when it happens I always feel a little nervous. Because I’ve not learned anything about what I just did. I can write in my diary the steps that I took but if they don’t work next time I’m in a mess.

I’ve just had this experience again. A few months ago I deployed an JavaScript Express application to Heroku. The process was really quite smooth, and I've totally forgotten about how to do it. Today I wanted to repeat the process and of course it all fell to pieces. Something, somewhere has changed and I’ve no idea where to go to fix it. If I’d had to battle with the first installation I’d be able to draw on a pile of resources to try and fix the problem. I’d know how to read the log files, get messages back from the code, deploy updates and whatnot.

I think that what I’m really saying here is that for a lot of things I try to do with computers I have to go and “live there” for a bit. This means spending time reading documents, writing test code and generally figuring out where all the bodies are buried. If something works first time I’ll not do that, so I’m building up a store of “ignorance debt” that will come back and haunt me later. The good news, I suppose, is that now I seem to be a situation (at least with this project) where I’m going to get a good opportunity to live with Heroku for a while.

The sensor that came in from the cold

sensor 03.png

This is Sensor03. It has spent the last couple of years attached to a building in Hull, transmitting environmental and air quality data to our server. I’m going to compare the output from the 2 year sensor with that from a new one and see if it has aged much. Then I’m going to take it to pieces and see what the insides look like.

I’m quite pleased with the way that the code and hardware has kept going all this time. You can take a look at the output from the remaining three sensors (plus some others) here.

Sensor Inside.jpg

This is what the sensor used to look like inside, I wonder if it will have changed much?

Amplifiers for sale

Amplifier.png

I found this camera that I really wanted. But I really shouldn’t buy it as buying cameras is a waste of money. Really.

So I decided to raise the cash by selling some stuff that I don’t need any more, which includes a couple of home entertainment receivers I seem to have accumulated. So today I spent a happy afternoon plugging them in, making sure that they work and then wondering why I replaced them in the first place……

They will be on eBay next week…. As for the camera, I’ve already bought it - so I really hope these things sell……

Routing controller messages in Pure Data

Controller patch.png

I’m quite proud of the above Pure Data patch. What’s Pure Data? I hear you ask. What’s a patch? you add. Why don’t you get out more? Well, that’s just not a very nice question.

Anyhoo, Pure Data is programming environment that you can use to process audio data. It is graphical (see above). A Pure Data program is called a “patch” and is comprised of objects that are linked together with “patch cords” which are drawn as lines. And, I do get out. Quite a bit as it happens.

One of the things that you might want to do in a Pure Data is get controller values and use them to control stuff in your patches. A controller is something with a control on it. This could be a knob you can twist or a slider you could slide. For example, you could use a knob to control the volume of a signal. You can buy controllers or you can make your own. I’ve just made one using a PICO device.

Controllers are connected to your computer using a protocol called MIDI (Musical Instrument Digital Interface). This specifies an electrical standard and a message standard. You can buy devices with MIDI sockets and connect them using MIDI cables. However, MIDI also works over USB connections. In other words you can buy a MIDI controller, plug it into your computer and it will be recognised as a MIDI device. Then you just need something that understands MIDI messages. The Pure Data environment can both talk and listen to MIDI.

You then tell Pure Data about your MIDI device and you can start to receive control messages in your music patches and use them to manage the behaviour of your digital instrument. But how does this work, and what is the best way to do it?

Pure Data provides an object called ctlin which accepts MIDI control messages and makes them available to a patch. Each time the user changes the value by moving a control, the ctlin object sends out data values as messages. To use ctlin you don’t need to do anything more than just plonk a ctlin object in your patch and start using the output values that it sends.

The ctlin object produces three outputs, the patch above uses two, the value that represents the position of the controller, and the number of the controller generating that value. Perhaps I might want to use the value from controller 21 to control the attack value of a sound, the value from 22 to control decay, and so on.

That’s what the patch above does. The left hand path through the patch takes the control value and uses it to assemble a send message to send out the value to any patches that wish to receive it. The right hand path uses the controller number to index a list of message destination names so that controller number 21 is sent to attack, 22 to decay and so on.

Then, anywhere that I want to receive the latest decay value, I just have to use a receive object:

receive block.png

The tiny bit of Pure Data above receives the decay value and then multiplies it by 8 before sending it on to another component.

An interesting thing about Pure Data is that send and receive are effectively broadcasts. Any patch can use the decay value. Probably not something you’d be keen on if you worry about global variables in conventional programs, but great if you have lots of components that all have to react to a particular value.

The great thing about my little controller patch is that you can add new messages for additional controller numbers just by changing the contents of the list.

If this is the first time that you’ve seen Pure Data, I’d strongly advise you to take a proper look at it. It really is great fun to play with, very immediate and a great way to introduce people to programming without having to actually write anything. And you can make some interesting sounds. You can find out more here.

Walkabout Mini Golf for Oculus Quest is now even better

walkabout2.jpg

If you’ve got an Oculus Quest (and even better, some friends who also have Quests) you should get Walkabout Mini Golf for it. I’ve already said this a while back. At the time I mentioned that I while I loved the game I didn’t think it was “proper” mini golf because there weren’t any windmills. Well, there are now.

Windmills.jpg

They have just added a whole new level with loads of windmills in a really lovely setting. The hole design is as fiendish as ever, and much fun can be had working your way round the courses. I love it when good things get better, and this game is a case in point. Very strongly recommended.