Consistency is key

height adjustment.png

I was quite proud of the height adjuster I made for Una my Ultimaker 3d printer. Although I wasn’t very proud of the way that I’d handled a lack of bolts of the correct length. Anyhoo, it seemed to work and allowed me to adjust the print head height just by turning the screw at the top. There was only one problem with it.

It didn’t work.

I could use it to move the switch up and down but it also moved the switch all by itself. There was too much play in the mechanism. I’d adjust the height carefully and then find that next time I homed the printer the height was all wrong again. Wah.

One of my favourite quotes is from Ralf Waldo Emerson and goes “A foolish consistency is the hobgoblin of little minds”. This is worth remembering when you are trying to make all the wires in your circuit the same length, or arrange your DVDs in alphabetic order and fretting about how the word “the” works in the movie title. However, when we are talking about things that only work if they are within a tenth of a mm of the correct position, I’m a big fan of consistency.

So it has been out with the fancy adjuster and back to the sturdy little bolts that fix the switch in one position. I’ve not got a bit more of a job to adjust the height of the print bed, but at least the adjustment will stick for a while.

The man who labels chutney

chutneylabels.png

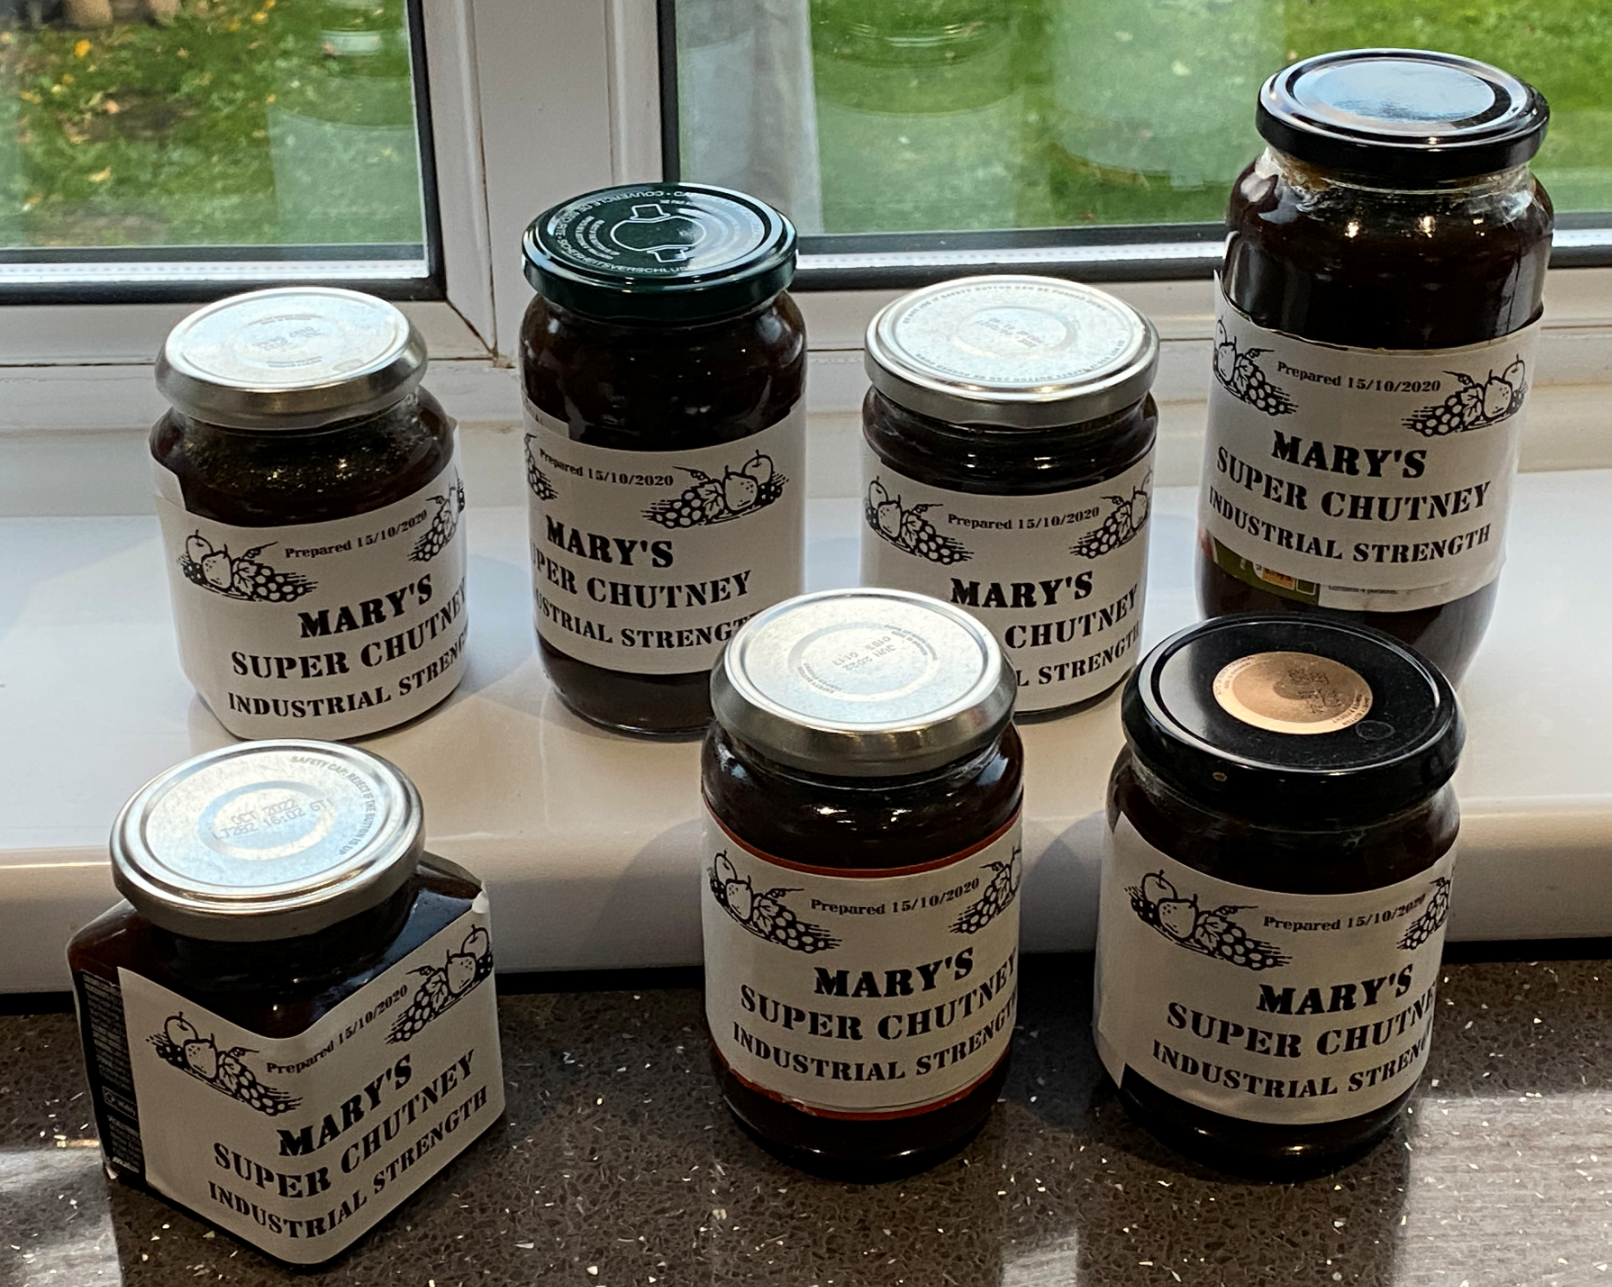
It doesn’t happen very often, but every now and then I find myself in the perfect position with just the technology that I need at my fingertips. It happened today. A while back number one wife came into possession of a large number of green tomatoes. Which screamed “chutney” to her and had the pleasing outcome of a number of differently shaped jars being filled with fabulous smelling stuff.

Today she asked me if I had any blank labels that she use for the jars. She was going to fill in each one by hand. “I can do better than that” I said and vanished upstairs for half an hour. A long while back I bought a label printer to liven up the entrant packs for Three Thing Game. So I happened to have a label printer and just enough labels to make the above. I’m rather pleased with the result.

Wide eyed and pinless

esp32 vroom.png

The ESP32 is mostly my weapon of choice when making embedded devices. The only problem that I’ve had with the device is that tends to be supplied as a device with ready soldered pins. This is fine if you want to plug it straight into a socket but I don’t tend to do that. I’m much happier soldering the wires directly onto the unit. This makes for a more reliable device and also allows me to use smaller boxes. T

The good news is that I’ve now found a supplier on AliExpress who is selling versions that don’t have the pins already fitted. They cost slightly more than the “normal” devices (which I find a bit surprising) but they do give a lot more flexibility.

One thing to remember though; it is a pain to build the ESP32 device into your device and then find that you have a faulty one. So make sure you test the ESP32 before you solder it in.

The power of the chamfer

freecad bevel.png

One of the problems that you can have when 3D printing is called the “elephant’s foot” problem. It is caused because the very first layer is usually printed very slowly and is very thick, causing it to spread out slightly. This leads to the side of the object having a profile that looks a bit like an elephants foot. Which I suppose explains the name…

I’ve found that one way to fix (or perhaps hide) this effect is to apply a “chamfer” to the printing face. This makes the first print layer slightly smaller and hides the foot effect. The chamfer is easy to perform in FreeCAD. You select the Part view in the Workbench and then select the chamfer option (it’s blue and looks like a chamfer (a corner with the edge flattened off). You can then select the face that of the object that you want to chamfer and you can get the rounded appearance you can see on the left hand shape in the design above. One day I’ll figure out how to do this from Python inside FreeCAD and then add it to the part design program.

chamfer.png

Then I print using a “brim” which is a bit of print around the outline of the object which helps it stick to the print bed. When the print has cooled I cut the brim off with some sharp scissors and this makes the edges look quite neat as you can see above.

Maketober Day 31: Christmas Cake to finish

cake.png

This is not actually something that I’m making. But I do get called in to give it a stir.

I’ve really enjoyed Maketober. Thanks to the folks at the Makerspace Hull for giving me the idea. It’s been very useful to have a focus on making (or at least achieving) something every day. I plan to keep on trying to deliver something useful each day and then write about it here. And I can’t wait until I’m able to go and show them what I’ve been making. And I might take along some cake too..

Makertober Day 29: Wiring up

wiredup.png

This is the completed light box, all wired up. I’ve printed a tiny little mounting plate that holds the ESP8266 device and allows it to be fitted onto the mounting pillars. I’m doing the wiring by soldering directly between the devices.

broken ring.png

I like using solid-core wire tor connections as it is easier to work with. But you have to be careful as it puts more strain on whatever it is connected to. Above you can see what happens when things go wrong. The solder pad for DI (data in) on the pixel ring has detached from the PCB and turned this ring into scrap. Fortunately I have a few spares.

fittingscrews.png

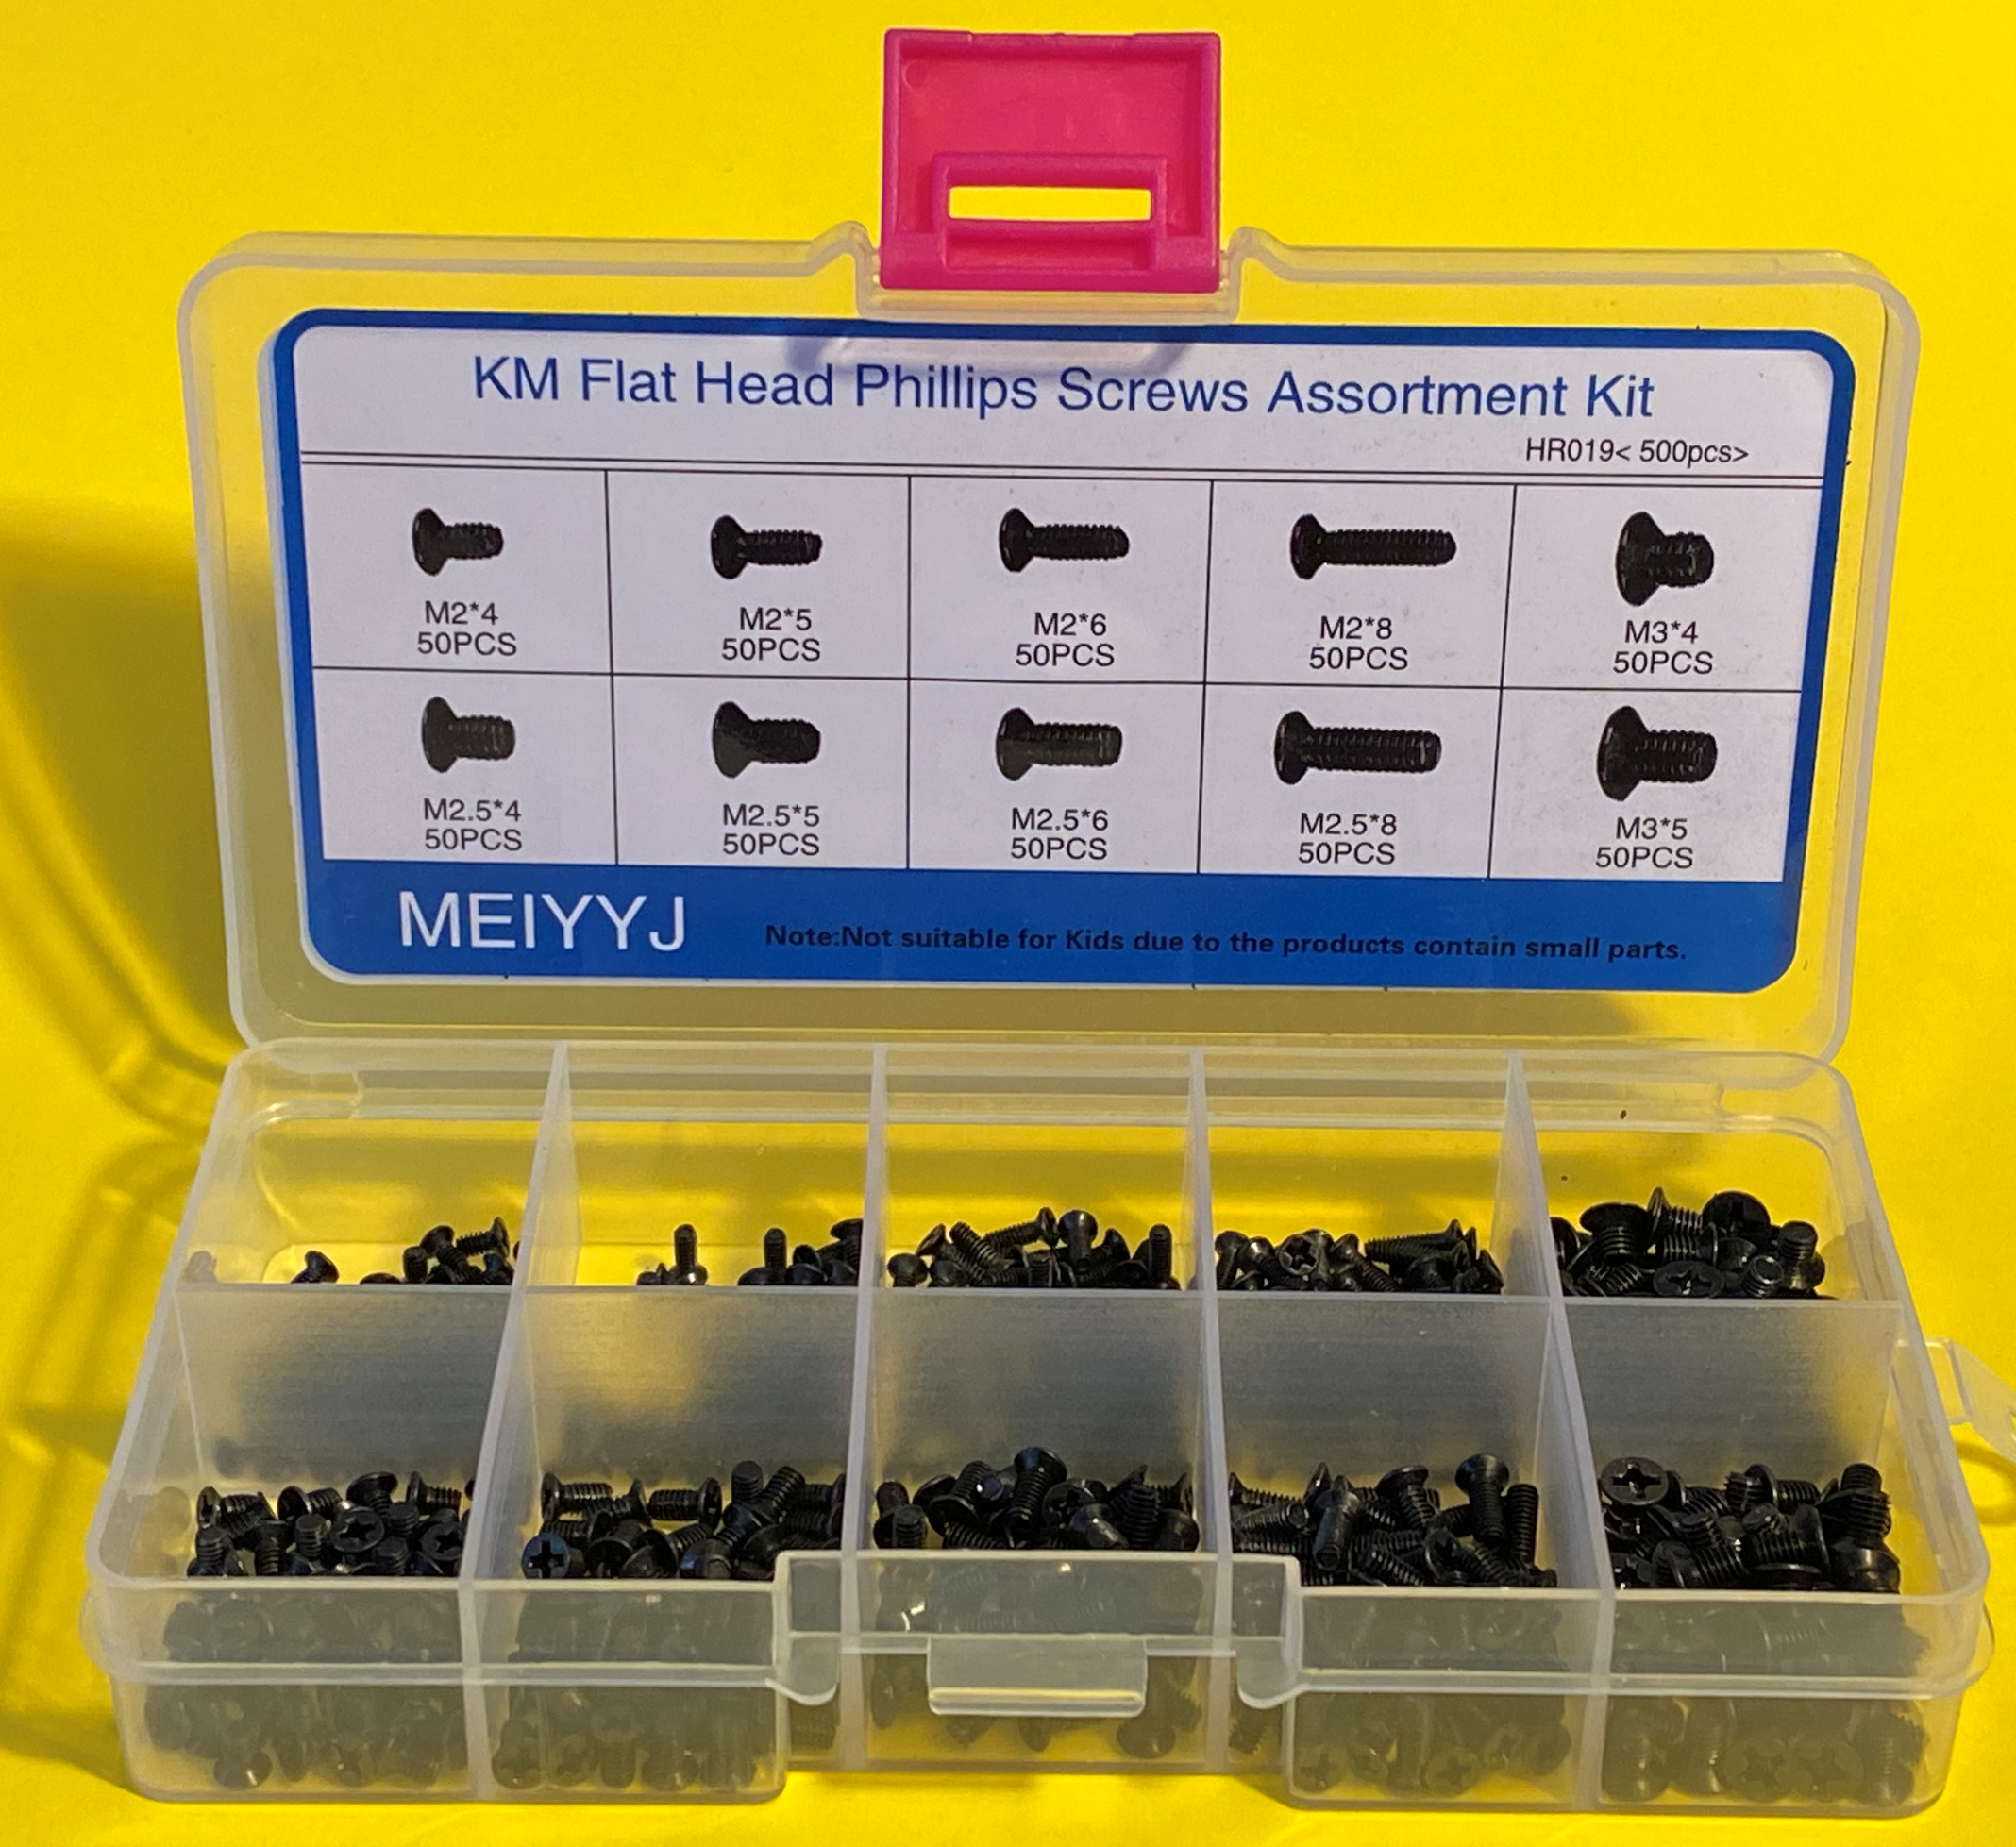
I’m fixing things together using tiny self-tapping screws. These can be hard to get hold of. I found this rather nice kit on Amazon for a reasonable price. The screws as supposed to be used when repairing laptops, but they work into 3D printed parts rather well. After a while I suppose I’ll use up all the screws of one particular size, but at least I’ll know which size to buy next time.

Makertober Day 28: Printing Boxes

Some people say that you shouldn’t use your 3D printer to make boxes for things. I disagree. Sure, a box is quite large and takes ages to print. But its not as if you have to spend that time yourself. Once you’ve set the printer off you can leave it to get on with it. Although I do still find the process fascinating to watch. Above you can see the output of my design which I think is fairly tidy. I could spend some time fiddling with settings to get the print better, but this is not actually something that the user will see.

shinyside.png

The reverse side, which is where the print was built up on my glass bed, is nicely shiny.

Makertober Day 27: Levelling your print bed

Yesterday I sorted out the printing temperature of my 3D printer. Today I’m going to spend some time on the other important aspect of 3d printer configuration: print height.

Una, my Ultimaker 3D printer is a “Fused Filament Fabrication” device. This is a posh way of saying that she “prints by squirting plastic onto a plate”. The distance the print nozzle from the plate is absolutely crucial. If the distance is too small you will get nothing because the plastic can’t get out of the nozzle. If the distance is too large you will get a ball of “plastic wool” because the plastic doesn’t stick to the plate and allow layers to build up. It’s also very important that the print head is the same height all over the bed, otherwise the plastic will stick in some places but not others.

bedlevelling.png

On Una you adjust the print height by moving the height limit switch up and down and then twiddling three screws to set the level of each corner of the bed. This is made much, much easier by a plugin I’ve found for the OctoPrint system that I use to send print jobs to the printer. You give this a bunch of locations and it moves the print head to each one in turn and lowers it down to the printing position. You can then adjust the height there and move on to the next one. Once you’ve been around the print area a few times you have got your print bed level. For my printer the correct height is when I can slide a sheet of paper underneath the print head and it just (and I mean just) catches the print head. I need to do this when the print head is at printing temperature.

I used to check the print height at positions all over the bed using a little height gauge but I’ve given up on that. My starting assumption is now that the bed is flat so that once the three points where it is supported are the right height the print height will be correct. If the print bed is not flat there’s not a lot I can do about it other than buy a new one anyway….

Makertober Day 26: Making heat tests

heattests.png

Now that I have something to print, the next thing I need is a working 3D printer. Oh well. Back into the fray. One of the factors that has a huge impact on the print quality you are going to get is the temperature of the print. So I’ve printed a bunch of tiny boxes to discover the optimal temperature. You can see the results above. It turns out that for optimal results with my printer I have to print at 215 degrees with a bed temperature or 60. If this sounds a bit high, you need to remember that the temperature is just the reading taken by the sensor in the head; not the actual temperature that the filament is being heated to.

In my print head the temperature sensor is right next to the heater which I think leads to higher readings. Anyhoo, from an engineering perspective any temperature that works is a good one.

Maketober Day 25: Making a light box

After a whole bunch of posts that have shown some creative uses of the word “make” but not actually described making anything, today I’ve actually made something. I’ve also done some time travel, going back to a program that I wrote quite a few years ago when I was designing boxes to put things in. I wanted to give the program a list of components and then have it turn out a box box for them. It worked especially well with the Microsoft Gadgeteer devices which were brilliant, wonderful and way ahead of their time.

def PirSensorBoxWemosWithPixelRing():
    print("Making PIR Sensor Box")
    proc = WEMOS("Wemos",verticalAlignment=VerticalAlignment.TOP, 
           horizontalAlignment=HorizontalAlignment.LEFT,xMargin=0.5, yMargin=0.5)
    holder = Device("blank", "blank", PixelRing.boardHeight, PixelRing.boardWidth,grid=[[proc]])
    lid1 = PIRSensorLidHole("PIRSensorLidHole")
    lid2 = PixelRingLightPipeLid("PixelRingLid")
    case = Case(wall_thickness=3,base_side_height=20,base_thickness=3.0,lid_side_height=5)
    case.makeParts([[holder]],[[lid1,lid2]])
    holeHeight=13
    holePos = Base.Vector((case.width-holeHeight)/2.0,case.height-1,-3.0)
    hole = Part.makeBox(holeHeight,4,8,holePos)
    case.baseDesign = case.baseDesign.cut(hole)
    case.show()

My box making system is written in Python and runs inside the FreeCAD tool. You can create component objects and then the system put them into boxes for you. The program works on pre-built software objects and has the ability to put components inside components. Above you can see the Python that makes a box that contains a PIR sensor, a 12 pixel neopixel ring and an ESP8266. The idea is that the will come on when you walk past the light. And, because the ESP8266 can do WiFi and other connected stuff I can make other lights come on too.

pirsensorbox.png

This is the output of the function. The ESP8266 is placed on the base of the box and the pixel ring and PIR sensor are fitted on the top. All I have to do now is print the boxes….

Maketober Day 24: Make a C++ class library for Arduino

robsSettings.png

Once you’ve written a bit of code you start to come up with libraries that you’d like to reuse in other projects. They might be things like drivers for particular pieces of hardware or useful storage or menu routines. If you are writing C++ code for your Arduino it turns out to be very easy to create library files. The Arduino development environment builds on what the C++ language uses to manage libraries.

It all hinges around the “library” folder in your Arduino installation. This is usually placed in the Arduino folder in your documents folder (as you can see above). You can also see that I’ve got lots of existing libraries. Every time I’ve downloaded a library it has ended up here. There is also a library file called Robs_Settings. That’s one that I made myself. If you have a look in this folder you will find the C++ source files that make it work:

settingfiles.png

For each library I have a .h file that contains definitions of the behaviours and a .cpp file that contains code. The idea is that a program that wants to use the library features will include the .h file so that it knows how to call the behaviours in the library. Then, when the program is built the compiler will find the .cpp file, compile the actual code and then all the different components will be linked together. When you start the compiler running you can tell it where to look for library files.

The Arduino environment knows the location of the library folder and will scan this folder when you open the “Include Library” option in the Sketch menu. It will show you any libraries that you have downloaded along with the one that we’ve just created.

arduino include.png

When I include the Robs_Settings library the Arduino environment scans the library folder and creates an include statement for each of the .h files that it finds in the folder:

included libraries.png

If you compare the code above with the contents of the settings folder you will see how this works. Now you can use any of the code in the library in your application.

Note: You might think that just adding the include directives above would make it possible for your program to use the included files. This is not so. The Arduino IDE does some behind the scenes shenanigans to link these includes to your library which will result in you getting errors when you build the program.


Maketober Day 23: Make a good book purchase

nature of code.png

There are two reasons why I wish I’d written The Nature of Code by Daniel Shiffman. The first is that it is really nicely put together and covers a whole range of useful topics in a very readable style. It’s really a book to be proud of. The second reason I wish I’d written it is that if I had I’d know all the content. Which I don’t - yet.

I think it would be especially useful to game developers as it covers a whole bunch of topics that you can use to make your code more organic and interesting.

All the programming examples are written using the Proccesing language. Don’t let this put you off. Processing has a lot in common with Java and JavaScript and the techniques can all be mapped over to these and other languages. I made a purchase of the book today. Strongly recommended.

Maketober Day 22: Make Life Easier with Microsoft PowerToys Fancy Zones

powertoys.png

I recently got a much larger monitor. Part of this was driven by a desire to see more of the world when flying with Flight Simulator, but also because I thought it might make me more productive. If it worked I my plan was to buy a video projector and paint the wall white..

Anyhoo, the new screen is jolly nice, but window management can be a pane (pun intended). Enter Microsoft PowerToys. Among a bunch of useful things is the very useful Fancy Windows utility. This lets you configure a set of zones onto your screen. You can then move windows into those zones by holding down the SHIFT character while dragging. This makes it really easy to spread things over your display. There are other ways you can push applications onto the zones but I like using the Shift key.

I’d say that just Fancy Zones was totally worth the price of admission to PowerToys, but as they are a free download this would be a silly point to make. The only tiny snag that I’ve found is that the tools work best when running as Administrator and can be a bit of a faff. However, I reckon the tools are totally worth the effort.

Maketober Day 21: Null Discoveries

pixels.png

It turns out that nothing is important. Programs need a way of explicitly denoting that something is empty of meaningful content. C++ uses the value NULL. [I did have this awesome idea for a nerdy T shirt with the slogan “HULL != NULL” which I thought would be a great way of bigging up the local area, but I digress].

Anyhoo, my lovely sprite library uses a linked list of sprites that can be added to a frame for display. Each sprite contains a link to the next one in the list. The “next sprite” link last Sprite in the list contains the value NULL to indicate that there are no more sprites. I like this because there are no constraints on the number of Sprites I an put in a Frame. I can just keep adding them if I want more. The frame contains a variable that refers to the first sprite in the list and when I want to work on all the sprites I just start at the first one and then get each one in turn.

class Sprite
{
public:
    Frame* frame;
    void update();
    Sprite* nextSprite;
};

This is an extract from the Sprite class header. You can see the nextSprite reference. Note that C++ uses the * character to denote that a variable is a reference.

class Frame
{
public:
    Sprite * sprites;
};

This is an extract from the Frame class. Now, when I want to update all the sprites I can use this:

Sprite* currentSprite = sprites;

while (currentSprite != NULL) {
    currentSprite->update();
    currentSprite = currentSprite->nextSprite;
}

The loop starts at the beginning of the list and works through them, updating each one. Good stuff. I ran this code in my ESP8266 device and it worked a treat. Much happiness. Then I ran it in my ESP32 device and it exploded. Much unhappiness. These are the worst kinds of bugs. The ones that are just not supposed to happen.

After a bit of head scratching I worked out what was going wrong. Turns out I’d done something stupid. When I make a new Sprite I have to make sure that the nextSprite reference is set to NULL. Otherwise my update function will head off trying to update sprites that don’t exist. Which will end badly. I’d not done this. In C++ if you create something you just get the space. It is not set to any sensible value.

Friendly languages like C# will automatically set sensible initial values to variables. It just so happened that in the ESP8266 version the nextSprite references had been set to NULL even though I’d not done it. So the program worked. However, in the ESP32 version they references just pointed at random pieces of memory which turned out the a recipe for “kaboom” when the program tried to follow them.

Moral of story: make sure that when you make a new something you set it to a sensible value. Sometimes you can get away with this, but not always.

Maketober Day 20: Making Enemies with Game of Thrones

GOT.png

I never got round to watching the Game of Thrones TV series. But now I’ve played the board game. It was hilarious. In the game you take control one of the factions fighting for the famous “Iron Throne”. Not sure why, it doesn’t sound very comfortable. The strapline for the game is “win or die”. I was always fairly sure where I was going to end up when we started playing this evening, but I gave it a good go.

The game lets you make alliances. This is great fun. Some players tried to ally with everyone else. I allied with someone and then promptly attacked them. A move that didn’t end well for me. And I now have a reputation for treachery that will take a while to live down.

The game is all about strategy and planning, which put me at a bit of a disadvantage to be honest. But by the end I was starting to figure out how things worked. Unfortunately, by this time I was down to one footman and a single piece of land. Here are what I’m going to try and do next time we play:

  • Make an alliance right at the start and make sure that it is properly mutually advantageous. The game lets you perform supporting moves for other players actions. Use these with your ally as appropriate. There are also “raiding” actions you can use to frustrate opponents moves. Use them too.

  • Remember that you only need to capture a particular number of castles. This is quite easy to do without taking over the whole board. The trick is to pick the right time to ditch the ally and then go for it.

  • You can use ships to move people around very quickly. Discover how to do this and then use it.

  • Remember that you only have 10 moves before the game ends. So no point in playing the long game.

  • Don’t forget that the hand of cards you can use to augment your battles will be restored to you once you have used them all. So don’t be afraid to take people on.

These hints come to you courtesy of a player who finished sixth out of six, but I did have a good time. If you like games like Risk, Campaign and probably poker, you will have a bit of fun with this game.

Makertober Day 19: Python as a prototyping language

pixelpanel.png

I’ve been waxing lyrical about the joys of using Python to create embedded applications. It turns out that there is no better way to put programs into an embedded device as long as your program is less than 300 lines or so and you don’t mind it chugging a bit.

Today I managed to hit both of these brick walls at the same time, when the NeoPixel sprite program I’m making both ran very slowing and out of memory. Oh well. The good news is that having used Python to figure out how the program should work I can now take the code and convert it into C++.

This is not a bad approach to development. Python is great for trying out ideas and the way that you can type statements into the console to find out what they do makes prototyping very easy. C++ is a bit harder to work with quickly, but it s a nice place to write big programs that go very fast.

Makertober Day 18: Making a working printer

backprintng.png

I think you should all know that the little plastic rocket above was the product of a lot of effort today. In the end I discovered that last time I mended the printer I’d left a tiny gap between two parts of the path into the print head. If the plastic in this gap melted it then formed a plug which blocked everything up. All I had to do was take the printer to pieces, put it back together wrongly a couple of times and then finally get it right.

So I know have a 3D printer that works. As far as I know.

Maketober Day 17: Making a broken printer

printerbits.png

Una my lovely 3D printer is what I call a “Schrodinger Device”. She’s got this title in honour of the celebrated “thought experiment” involving a box containing a cat and something that might, or might not, kill the cat. The idea is that right up until you open the box and take a look inside you don’t know whether the cat is dead or not. From a quantum perspective you can regard the cat as both dead and alive until you find out what has happened. The same kind of thing happens with Una. At any given time I may or may not have a working 3D printer. I only find out which is true when I try to print something. I’ve owned many such devices in the past, including a Mini Traveller that sometimes was a car and sometimes wasn’t.

Anyhoo, today when I tried to print a box for a LED panel that I’ve been playing with I discovered that Una is no longer a printer. I’ve spent most of the day proving that this fact is most definitely true. In this time I’ve replaced some bits, recalibrated others and cursed all of them. Oh well.

Maketober Day 16: Making a mesh of things with eero

eero.png

Curse you, Amazon Prime Day. I wasn’t going to buy anything until you came up with a nice discount on a set of three WiFi mesh devices from eero. I’ve been having problems with WiFi reaching all round the house and so I ordered some. The idea is that the three devices work together to extend network coverage around your house. They can forward messages from one to another over the air or via a wired connection.

They do have one major limitation though, which I knew about before I bought them. They don’t do PPPoE authentication. What’s that? I hear you ask. It is part of the process of managing the connection to your network service provider (in our case KCOM and their lovely LightStream fibre). It’s used in lots of places around the world that aren’t America.

In a perfect (but perhaps less secure) world you could connect one socket on an eero node to your network modem and the other onto your local network and have eero look after everything. But because the eero can’t authenticate the connection to your service provider you have to do the next best thing, which is attach the eero to a network port provided by your router. You need to keep the router to do the authentication .This slows things down slightly in that the router is already managing a local network for your house and you are hanging another managed network off that one. However, I’m not interested in the fastest possible network connection. I just want my devices to work all round my house.

I copied the WiFi SSID and password from my KCOM router into the eero and then turned off the WiFi in my KCOM router. This meant that everything around the house has just kept going. The next step will be to put the router into “bridging” mode which turns it into a very simple network connection (rather than the manager of a network that I don’t need). To make this work properly I’ll have to put all the wired devices in the house “downstream” of the eero device which I can’t do at the moment because unlike my router, the eero doesn’t have multiple network ports.

It probably sounds a bit more complicated than it has turned out to be. The good news is that I’ve got much better WiFi around the house. The eero app that you use to manage everything has some very powerful features that let you do things like turn off specific devices and create profiles for combinations of devices. If you’re thinking of getting more WiFi around the place you could take a look at the system. Especially if it is nicely reduced.