Fixing Una

Whenever I start to think of my 3D printer as an appliance it promptly breaks. Actually, this time it was my fault in that I started a new print without removing a completed one. The resulting crash was quite noisy, as the rubber belts did what they are designed to do, and slipped.

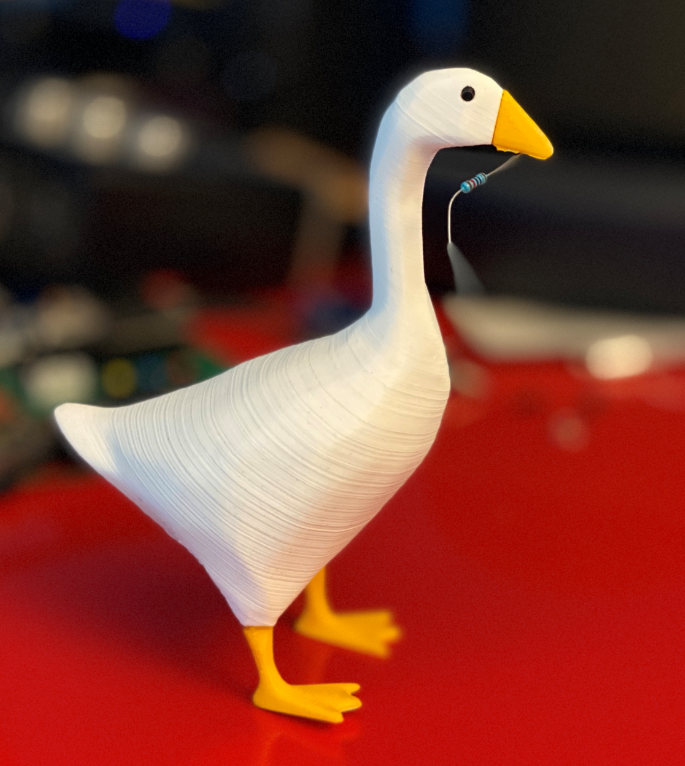
The printer itself seems undamaged, which is a relief, but I figured it was time to show Una some care and attention. After all, she is nearly eight years old. And I have got a replacement set of belts and a new print nozzle to fit. So I took everything to pieces…..

One of the principles of 3D printing is that any given job on a 3D printer will take a day. Even if you think it will take a couple of hours. This one was no exception, but by the end of the day I had the belts replaced and print head back in position.

Next I just have to level the bed and adjust the distance of the head so that it prints properly.

Winning and losing with the led cube

It turns out that sometimes the only way to find out how to do something is to try and do it. That’s what I’ve been doing today. I’m building a cube out of LED panels. And today I ran out of reasons not to start assembling the parts. Above you can see one of the led panels that are going to be the faces of my cube. I’ve removed the original chassis from the back of the panel and fitted one that I printed yesterday. The new chassis is slimmer and has bevelled edges that let the sides fit closely together.

My printed panel fits exactly (more power to you Una the Ultimaker). I just had to remove the teeny tiny screws that secure the panel to the original chassis and then refit them into the the newly printed chassis. This is a fraught business. The screws engage with really tiny holes in the panel circuit board. If the screws miss their holes they tend to cut through tracks on the panel (that’s one panel broken). If you try to line up the panel with the chassis by pushing a pin through the hole in the pcb board this can catch on the leds on the front of the panel and remove them (that’s two panels broken)….

I managed to fix one broken panel by scraping the paint off and then re-making the connection with a blob of solder. The other panel has three LEDs on one edge which don’t light up red. Oh well. I ordered one extra panel in case of problems like this and I can still use my “broken” one in a picture frame as I just have to crop out that three pixel column from the side. On the whole, I’m going to call this progress…

If you want to see the work in progress I’ll be taking all my bits to the Hardware Meetup tomorrow. You can sign up here.

Untitled Goose Printing

If you’ve got an Xbox Game Pass you play Untitled Goose Game for free. And you should. You take the role of an annoying goose with a mission to cause havoc. The pace is nice and gentle and the animation and drawing is really well done.

And number one son has found a design on Thingiverse to print our very own goose models. You can see my first effort above. I need to work on the layering a bit but overall I’m very pleased with the results. You can fit a magnet into the beak so that your goose can hold little metal objects.

The design supplied in for the white, yellow/orange and black parts. We’ve found that ordinary “superglue” (cyano-acrylate) does a good job of holding the parts together.

My goose has a slightly rakish stance because he fell off the desk and broke his foot off which I had to glue back.

3D Printer Tip - use good quality filament

I remember a while ago someone saying that the average 3D printer can produce output with the quality of “the toys that you can find in a Christmas Cracker”. Well, we are making our own crackers this year (just for fun) and I’ve found a nice set of animal shapes that we can use. I dropped the designs into Cura and sent it over to Octoprint for printing by Una, my venerable old Ultimaker One. She’s seven years old now, but still prints really well.

I think one reason for the quality of the output is that I’ve stopped buying cheap filament. A few years ago I went through a phase of being impressed by 1Kg reels of printable materials available for only a fiver. I tried a few and the quality varied a lot. And some had the habit of snapping off during feeding, which meant for loads of fun getting the broken bits out of the print head.

I now use this stuff. It’s not cheap, but it is not stupidly expensive either. It is consistent, adheres well and the colours look good. And it comes on nice spools. Bearing in mind the time it takes to print stuff, I’m unlikely to use a hugely expensive amount of it.

Awesome Overhang fun

So I’m printing some camera clips on Una, my Ultimaker (seven years old this year). I forgot to ask for support for the print. I needed support because the top half of the clip just sticks out into the air. If I’d asked for support the gap on the left of the picture above would have been filled with removable printed bits that support the “ledge” that is being printed.

However, when the print finished I was impressed that even with the lack of support I’d got something that is probably usable. You can see the dangling loops of filament at the bottom of the ledge but after a few layers they had bunched together enough to get enough material to complete the print.

I’m not proud of my inability to specify support when a print needs it, but I’m very proud of the way that Una coped without it.

Octoprint is wonderful

I mentioned on Sunday that I was a bit worried about the SD card reader on my lovely 3D printer being potentially unreliable. For years (seven actually) I’ve been writing my gcode files onto an SD card and then plugging into the printer for each print. This is probably not a good idea (and hasn’t been one for a while).

Anyhoo, a couple of failed prints on Sunday left me wondering about a better, and less physical, way of connecting the computer and the printer. I could just plug the printer straight into my computer, but I’ve never been keen on doing this. Knowing my luck the Windows 10 update process would steam in and break a print 8 hours in.

So today I took a proper look at Octoprint. Its a server that you attach to your printer. It gives you a lovely web interface that you can use to manage your prints and it also has a plugin for Cura, my favourite slicing tool so I can just open the files in Cura and then send them straight to the printer.

It’s wonderful. The installation is a breeze. There’s a boot image for Raspberry Pi that you just have to copy onto an SD card and you are in business. You don’t even have to attach a keyboard and screen to the Pi you are using a s server because you can do it all over SSL and via the browser.

I’ve done a couple of prints and they’ve worked very well. The next thing I’m going to do is attach a webcam to the server so that I can view print progress remotely.

If you have a 3D printer and a spare Raspberry Pi lying around you should definitely take a look at this.

What is unreliable?

Una, my Ultimaker printer has been very busy over the last week. We’re doing a “Build a robot in a day” course and we need 15 sets of printed parts for the robots. Up until today she was printing beautifully, and I made the mistake of thinking “My goodness, the printer is working well”. Bad move. She promptly stopped dead in the middle of a print. Oh well.

It made me thing a bit about what we regard as reliable. The way I see it, as soon as a thing fails once you have to regard it as unreliable. There are not that many “acts of god” that can come out of the blue and stop something from working just one time. What usually happens is that you either face up to the fact that something is broken at the first point of failure, or you spend the next few weeks discovering just how broken it is.

I think I’ve traced the problem to the SD card that I was using, which might be going a bit “soft”. That or the memory card connector in Una. I’m thinking about installing Octoprint and removing the need for SD cards.

And I’m trying really hard not to think how well things are working…..

Slow and Steady Prints the Best

What failure looks like…

I’m doing some 3D printing to make cases for air quality sensors. I know that 3D printing is one of the slowest way to make a case and I’m going into Hull Makerspace to play with their laser cutter this week to see if I can make stuff much more quickly, but I happen to have a 3D printer and it seems sensible to use it. However, it has not been plain sailing….

I’m using some new filament, and when you do that you have to learn the right temperatures to work with it and how friendly it is. The new stuff has not been very friendly. Mainly because it didn’t want to stick to the print bed. The print bed is the surface upon which the printed object is laid down by the print head.

When 3D printing the most important stage of the print is putting the very first layer on the print bed. If this doesn’t stick, everything else is going to end up a like a ball of wool (see above). And I couldn’t get the new filament to stick properly. Even after spending ages adjusting the bed level and height, changing temperatures and adding adhesive I’d still get terrible results.

I’ve found that the key to success is to print the first layer very slowly, giving it time to take hold. The snag is that slow printing takes ages. Fortunately the latest versions of printing tools have come to my rescue. The latest version of Cura (the magical tool that I use to convert 3D models into printer commands) lets you set the speed of the first layer print.

There are so many print settings now that the settings process also contains a search function. If you search for “speed” you can find the initial layer print speed settings as shown on the left.

If I use the settings shown I get quite astonishing levels of print adhesion. In fact I can do away with glue completely and print onto smooth glass, which gives a fantastic finish.

I’ve now gone from having a problem getting the print to stick to having a problem getting the printed piece off the printer. But I’m very happy with that.

Creating 3D Printed Text Masks

I’ve been refining my light printing technology, based on the “Do it for Josh” light (which is still available by the way). The first version used a printed mask and transparent letter inserts that were stuck inside it. It worked OK but it was a pain to assemble and the letter inserts kept falling out.

So I’ve designed a new version in which the letters and the masks are all printed in one. The clever (I think) bit is that I print the first few layers using transparent filament and then switch to solid during the print. I quite like the effect, and it means that I don’t have to assemble anything.

If you’ve got a 3D printer you might like to experiment with changing filament during the printing process, most printer firmwares have an option to do this and you can get some quite nice effects.

Hot Fingers

I’ve been doing a lot of 3D printing lately. What with josh lights and everything. Today I thought I’d replace the print nozzle on Una, my 3D printer. Turned out that hardest part of the process was finding the replacements that I’d rather sensibly bought a while back. I looked where they should have been and didn’t find them. This triggered a huge hunt all over the house, loft and garage. All to no avail. So in the end I resorted to going tack to where they should have been and used the ancient old trick of looking properly. And of course they were there, tucked in the bottom of the drawer. Idiot me. But, on the bright side I now know where lots of things are that aren’t 3D printer nozzles.

Replacing the nozzle on a 3D printer is made much more exciting that it might be by the way that you have to do it when the print head has been heated to 200 degrees centigrade. Fortunately I’ve done this before, and consequently no longer have any nerves in my fingers so, in no time at all, the old head was off and the new head on. I think the prints look better, which is a good thing.

Making a lightbox

Yesterday I had a bit of a cold. Today I seem to have got all of it. So I feel rubbish; what better time to do something silly. I've decided to make a letter light for number one grandchild. See if you can use your skill and judgement to work out her name from the above picture. 

I found a really nice design on Thingiverse for letter boxes, but I would have had to stick them all together and make a box to put them in and so on and so on. No fun. So I've written a little Python program that runs inside FreeCad to grab the STL designs, convert them into FreeCad shapes, stick them all together, create a backplane for the light box and then a plinth to put them in. I've even added a hole for the power socket and wall mounting holes. 

I've discovered that I can just handle a six letter word if I print diagonally on Una my Ultimaker original - still doing a sterling job after six years. The light boxes are 30mm in size and a perfect fit for some waterproof neopixels that I had lying around. 

I'm printing out the bits and fitting them together at the moment. I'm going to make a modification that lets you make a box with multiple lines and then when it's all working well I'll put the code up on GitHub.  

3D Printing "Snap Off" Components

I'm putting together some Hull Pixelbot kits and one of the components that I need is a set of spacers to separate the circuit boards from the perspex base and top. You can of course buy these, but I'm too mean to do this, and I happen to have a 3D printer that I can play with. 

I wanted to print all the spacers as a single item, so that I don't have to count them into each kit. One way to group a bunch of components together is to print using a "brim". A brim extends around the base of a piece and helps it stick to the printer base. If components are placed close together the brim merges to form a single sheet which holds all the components together. This works well but it can be quite a pain to then peel the brim off the items once they are printed, particularly if the items are small, like the washers above. 

The solution I've come up with is to print a single layer which sticks all the elements together,  followed by another layer on top of that which stiffens the support layer. If you look at the picture above you'll see that the top layer doesn't go all the way up to side of each spacer, there's a tiny gap around each one. This lets you "snap" the spacer out of the base.

One other trick that I'm using with my spacers is to print the first layer of the spacer with a hole which is slightly smaller than the others. This means that the spacer will grip onto a bolt, so that they are a bit easier to fit onto the robot when you are building it. 

Network your 3D Printer with Windows 10 IoT Core. If only.

I've installed Windows 10 Creator's Edition Fall Update. It's very nice. It has a lot of extra support for 3D printers. And I got all excited when I found out that there's an application for the Windows 10 IoT Core running on Raspberry Pi that lets you install your printer on the network and then print to it straight from Windows 10.

It doesn't work. At least, not for me. I've spent all afternoon creating SD card images, configuring them and then finding out that I always get assigned the same (wrong) printer device and then the driver fails to load. 

Oh well. 

Design Iteration

One of the nice things about having a 3D printer is that it makes it really easy to iterate designs. I'm working on a new design for the configurable game controller. This version will have a socket for an input device and a bar-graph above each socket. I think I've found a design that sort of works, now to make up a panel. 

Oh, and one 3D printing top tip from Rob. Don't use oil on the sliding components. I thought this was a good plan, adding some "3 in 1" until the print head was moving really freely. What I'd forgotten though is that oil is sticky, and attracts dust. So when I fired up Una to print these prototypes she became very upset and pretty much locked up as all the sticky dust gummed everything up. Fortunately, after a good clean-up she's now working just fine. 

HullPixelbot Fridge Magnets

I've spent a chunk of the weekend printing Hull Pixelbot fridge magnets. I just took the logo and fed it into Cura (the slicing program that I use for Una, my 3D printer) and after a bit of fiddling I managed to get a 3D object that works quite well.

Once printed I just have to rub a black marker pen over the 3D text to make the letters stand out. Although I wasn't as careful as I should have been, which has made them a bit smudged. Perhaps I can print a little mask to put over the text when I ink it.

Anyhoo, the magnets will be going on sale soon in aid of Comic Relief. I'm doing a lecture in rhyme again this year all about robots, accompanied by a bunch of dancing Hull Pixelbots.

Oh, and if you are in the university on Wednesday I'm also doing a Hull Pixelbot seminar thee too.

Hull Pixelbot Version 2.0

I've just released a new set of design files for the HullPixelBot. I've made some improvements and also added holders for the pixel lights (always useful in a pixelbot) and the distance sensor. I was quite proud of the design for the distance sensor holder, until I tried to use it. 

I thought I'd been clever by providing mounting slots for the distance sensors so that the wires could come through the slots for the connections on the back. Turns out this was actually stupid. It turned out to be really hard to make the connections with the hole. 

The new design (which you can see above) has separate holes for the two sensor wires, and they are arranged vertically so you can just connect all the bottom wires together to a common ground (or reference voltage) and then take each of the top wires and connect them to their potential divider resistor and reference voltage (or ground). I'll be doing a detailed post about wiring things up a little later. 

HullPixelBot is going places

I spent a happy chunk of today designing and printing a front sensor assembly for the Hull PixelBot. The new part provides an ultrasonic distance measure and three light sensors. 

This will mean that the robot will be able to find and move towards light sources and also detect obstacles in its path. 

You can find out more about HullPixelBot at the next C4DI hardware meetup on Thursday 18th August. Sign up here (it's free). Anyone can come along and get into building tiny cheap robots. I'll have some more chassis kits to give away. All you need to do is add around 10 pounds worth of parts and you have a wandering pixel bot. 

And if you want to see a bunch of HullPixelBots in action I'm taking a mini-swarm to the Amy Johnson Festival Makerfest in Hull on 27th of August. 

Who knows what they'll be doing by then....

Get Cura 2.1.2

Una, my four year old, hand built, 3D printer, just got a lot better. I've just downloaded the latest Cura slicing program and used it with the default print settings. And Una has produced some of the best looking prints I've seen for ages. Well up to the standard of the Ultimaker 2;s at work. The new Cura defaults are a lower temperature than I normally use, with a cooler heated bed too. But they work really well. There looks to be quite a few changes in the way that the slicer works and the user interface is now very slick.

The only thing I'm missing is a way to tell Cura that the print head on Una is a rather strange shape, and not the default. If I can't do this it means that its hard to print multiple objects on the platform because the fans will crash into parts already printed if I'm not careful. However, it's a small price to pay for such lovely print quality.

The great thing about Cura is that it is free and it works with a huge range of 3D printers. If you haven't got it, you should get it. If you have got it, you should go for the latest version. 

3D Printing at Cottingham WI

I've done talks at Cottingham WI before. Great fun. I was invited back again this year and, rather than talk computes I thought I'd take along the 3D printer and print some cheese.

The printer behaved herself impeccably. I love the way that I can throw my Ultimaker into a blue IKEA bag, take her somewhere and have her just work. Anyhoo, everyone was fascinated. Best question of the evening: "Why is it called a 3D printer?"I really don't know. You can't really call it a printer as it does't print as such. It makes things. I quite like the name "fabricator", but the world seems to have decided its a printer. So that's that. 

Thanks for inviting me and being a great audience folks. And I got to judge the chocolate brownie competition, which entailed sampling every one. Which was lovely.

Printing Green Cheese for 100% Students

I've been giving awards for the best performance in First Year labs and exams. Last week I gave awards to the top five or so exam scores. When it came to the practical work I had a bit of a problem, what with ten students getting 100% in the work - which is awesome by the way folks. 

Anyhoo, it means that Una the 3D printer has been busy for a large chunk of today dropping out perfectly formed pieces of green cheese for next Monday's lecture....